Monday 29 February 2016

Deep and crisp and even

... the embossing, that is!

Yes, it's another Christmas card! And this time I've used three different embossing folders - a classic Cuttlebug one (I think it's called Divine Swirls), a Darice snowdrift one and a snowflake one that, along with the sentiment stamp I've used, were covermounts on a magazine last year.

For an A5 card front, I've used 6cm squares and embossed two with each design. The sentiment is slightly raised with thin foam tape.


I'm sharing this with

Ooh La la Creations - add a sentiment
Sweet Stampin Christmas - Snowflakes 
AAA Cards - Embossing

Sunday 28 February 2016

A very merry Unbirthday to you!

Lewis Carroll's famous saying about Unbirthdays is untrue just once every four years - in Leap Years, we can celebrate 365 Unbirthdays instead of 364. So a very happy Unbirthday to all of you - unless it actually happens to be your birthday today of course.

I've used papers and a sentiment from a very old Hot Off The Press kit, and put them together in very much the classic HOTP way, with lots of layers and light inking on the edges of the papers, then finished it off with a couple of fabric flowers that have been in my stash for years - this was an excellent "decluttering the stash" card to make!


I am sharing this with

Allsorts Challenge - Sentiment in Focus

Punch-lines

I had a card carefully planned for my snippets card this week....... and this isn't it. When I started to rummage in my snippets box, the snippets told me they weren't going to play what I wanted them to play, and suggested a completely different game to me. If I can get them to co-operate, I'll make my idea into next week's card!

So anyway, I pulled out a selection of pink and purple snippets in different shades and textures,  and punched a circle and a butterfly from each one. My circle punch is 1.5" and it took 9 circles to fill  the front of a 15cm square card (what's al that about never mixing metric and imperial? I do it all the time!). I sorted the circles into approximate colour groups of pale pinks, darker pinks and purples, then mixed up the butterflies so that each stood out well against its background circle and added each one with a foam square.

Now, decisions decisions - a side opening card?

 
or a tent fold one?


Whichever way you look at it, I'm heading over to the Snippets Playground where the now-recovered Miss Di is back in charge and has her eagle eye open for illicit hooch and general behind-the-bike-shed shenanigans. I hear somebody's planning to steal the pea from her whistle.....

Clarice Cliff style

I've been a big fan of Clarice Cliff's work for many years and would love to own one of her ceramic pieces, but the closest I have come so far is a set of Woodware stamps that I've had for several years. They are not original Clarice Cliff designs - there are probably all sorts of copyright issues that stop them from doing that - but are a tribute to her work, designed by the very talented Francoise Read.

Today I've used the stamps to make a very CAS New Home card, choosing Promarkers in typical Clarice Cliff colours for the image, which I've raised slightly on foam pads.

And I have a useful tip for you - when resting your chin in your hand to think about where to position an image, don't rest your elbow on an open black ink pad.


I am sharing this with

Addicted to CAS - HOME
Addicted to Stamps and More - Make your mark

Saturday 27 February 2016

Cupcake Christmas

I don't get on all that well with digis, sometimes when I colour them in with Promarkers I end up with all the ink going grey and sludgy, and yet other times the print stays put and the images colour beautifully. And I'm sure I don't do anything differently!

Anyway, this image, called Cupcake Candycanes, from Bugaboo, seems to have been on its best behaviour when I coloured it, despite using non-traditional colours for the candy canes to match the non-festive backing paper I chose (from my trusty DCWV Stack 9 pad - how did I ever cope before I had that?)

I computer generated the sentiment, tweaking the RGB balance of the colour until I got a pretty much perfect match for my layering card. The gems are from the fab bargain bag I bought at the show yesterday.


I'm sharing this with

Crafty Creations - something to eat/drink
Addicted to Stamps and More - Make your mark
Winter Wonderland - Must use a Sentiment
Crafty Hazelnut's Christmas Challenge - Use a Sentiment
Clear it Out Challenge - Food Related Digis/plaid  

Glittering butterfly

Don't you HATE it when your photo comes out looking completely different from the original? Anything with any kind of glitter or sparkle seems to come out looking totally dull and flat, or a completely different colour, especially in the winter when there's seldom enough good natural light and you need to use flash.

So you're going to have to take my word for it, the glitter I used for this butterfly is exactly the same shade of purple as the card I've used for the inner layer! Anyway, the current Butterfly challenge is Glitter and/or Grape and this card ticks both boxes.

To make the card, I made an A6 green card blank and punched a pretty border along one edge, then stamped the sentiment using one of the gorgeous sentiment stamps I won in the Snippets Playground a couple of weeks ago.

I used a Spellbinders die to cut the butterfly from double sided adhesive sheet, peeled off the backing and stuck it to the card and then peeled off the front and scattered glitter over it, pressing it in well and then gently brushing off the excess. Finally I added an A6 sized panel pf purple card behind the front, sticking it just along the top edge to allow the front panel to hang loosely in front of it.


One little dinosaur

OK, I know dinosaurs weren't actually very little, but this one stamped with elements from a Clearly Besotted set, looks as if he is a really cute little guy.

Because I wanted to keep to one layer, I coloured him in with ordinary markers rather then Promarkers, and wasn't happy with the "stroke marks" so I took a slightly damp paintbrush and blended them out. Then I masked him off and stamped the hills behind him, the sunshine and the sentiment.

To give the dinosaur prominence I decided to colour the rest of the design in very lightly and sketchily with just a few strokes of pencil.


I am sharing this at

Fan-Tastic Tuesday - Add an animal
Shopping our Stash - One is a lonely number

Friday 26 February 2016

A day at the Make It Show

Today I spent the day at the Make It Show, a two day event held at the FIVE event centre in Farnborough, Hampshire. It's not an event on the grand scale of the NEC shows, or the recent one (CHA?) that some of you lucky American ladies have recently blogged about, but it has the huge advantage, for me, of being only 10 minutes' drive from my home. And less travelling time means more shopping and inspiration time.

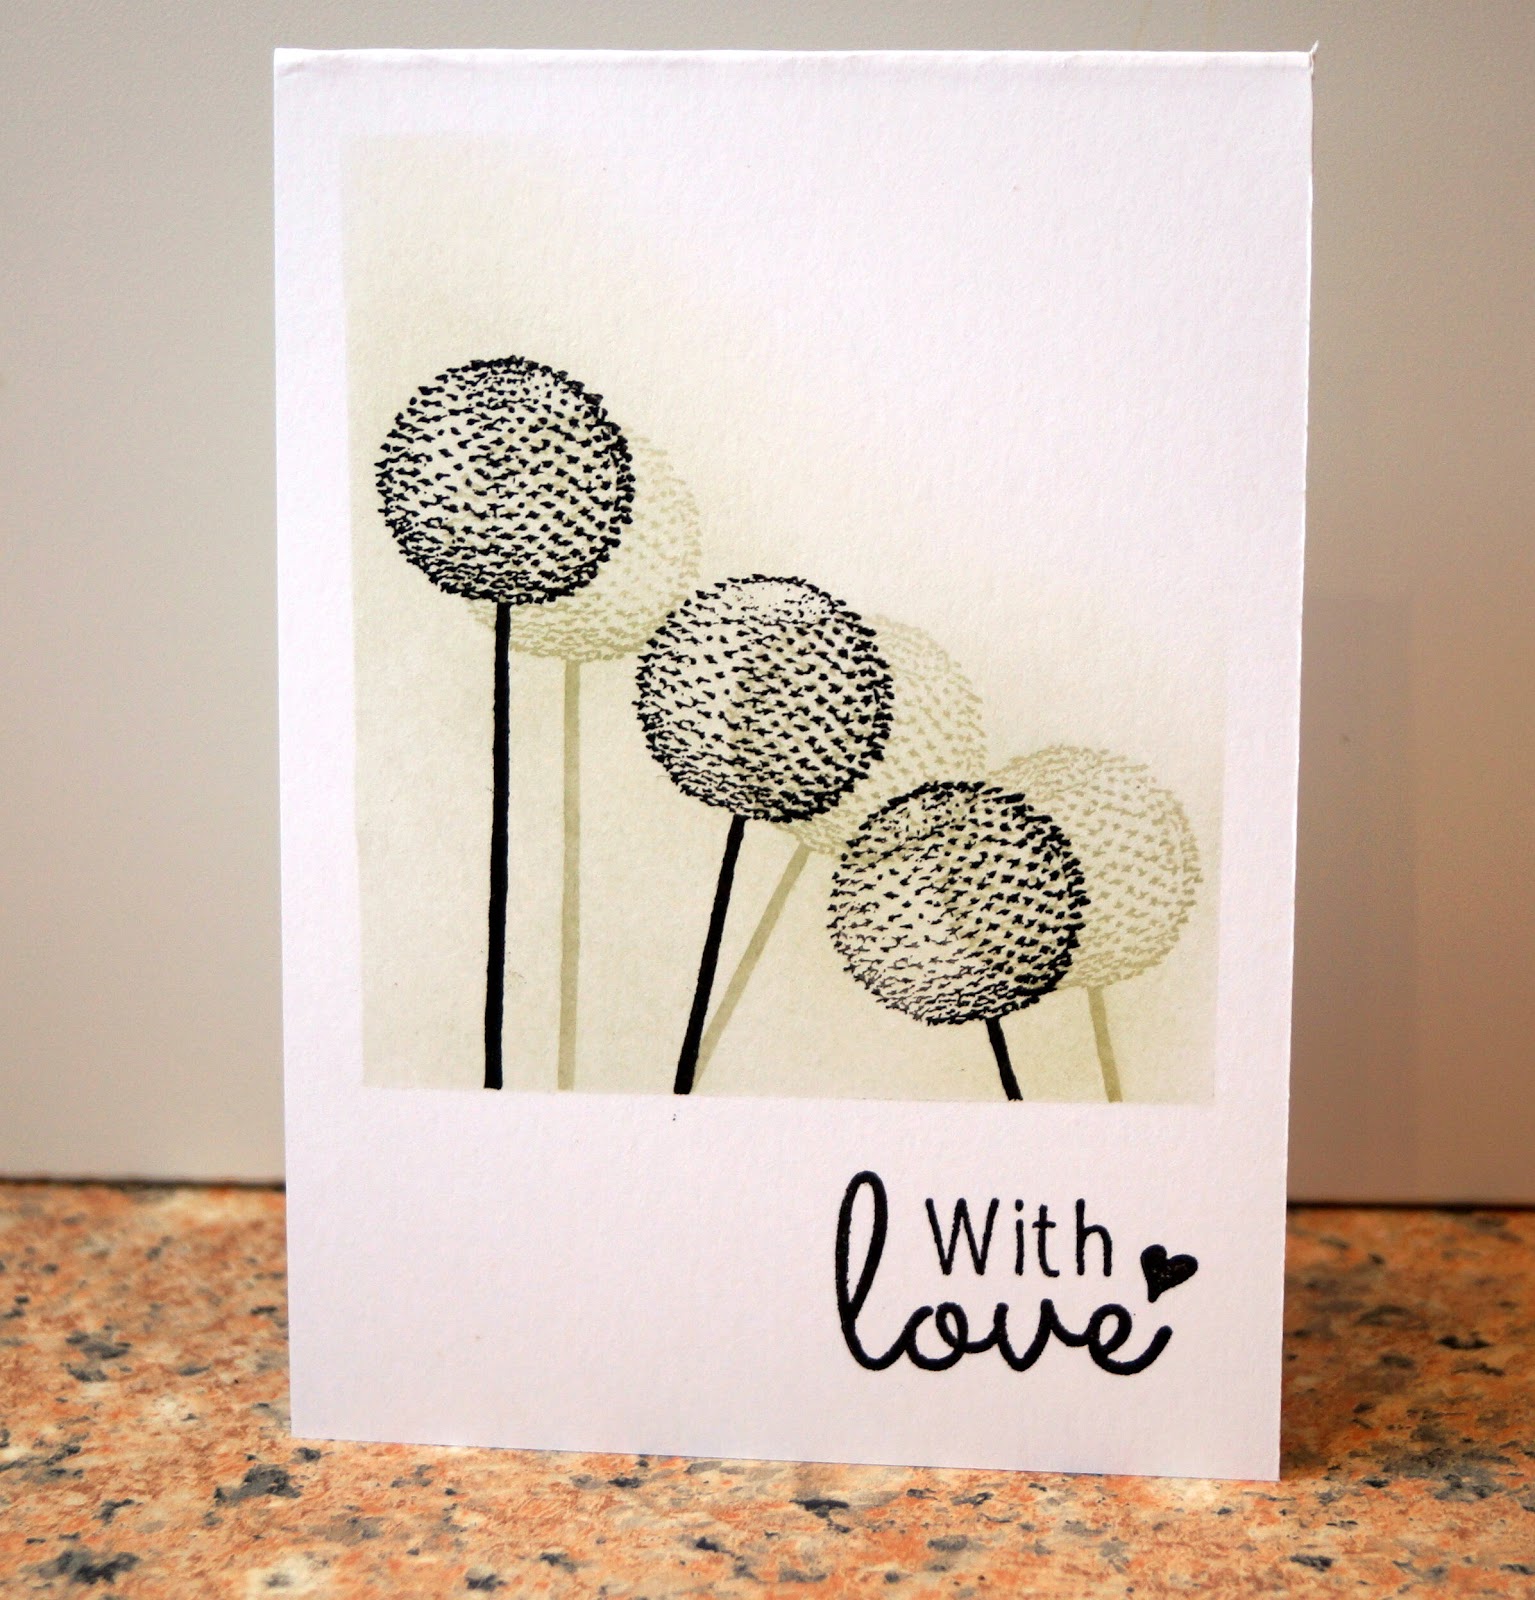
Oh and inspiration was there in shedloads this year! There seemed to me to be more exhibitors than in the last few years, many of whom had demonstrations, make-and-takes and static displays on their stands. The static displays give you a really great idea of what the latest fashions in crafting are, and this year the main look seemed to be delicate and dainty (two words that don't come naturally to me) with fine stamping, subtle watercolouring and very little in the way of bling or grunge. But of course those are the products they are trying to sell us this year - what we'll actually fall in love with and BUY is a different matter!

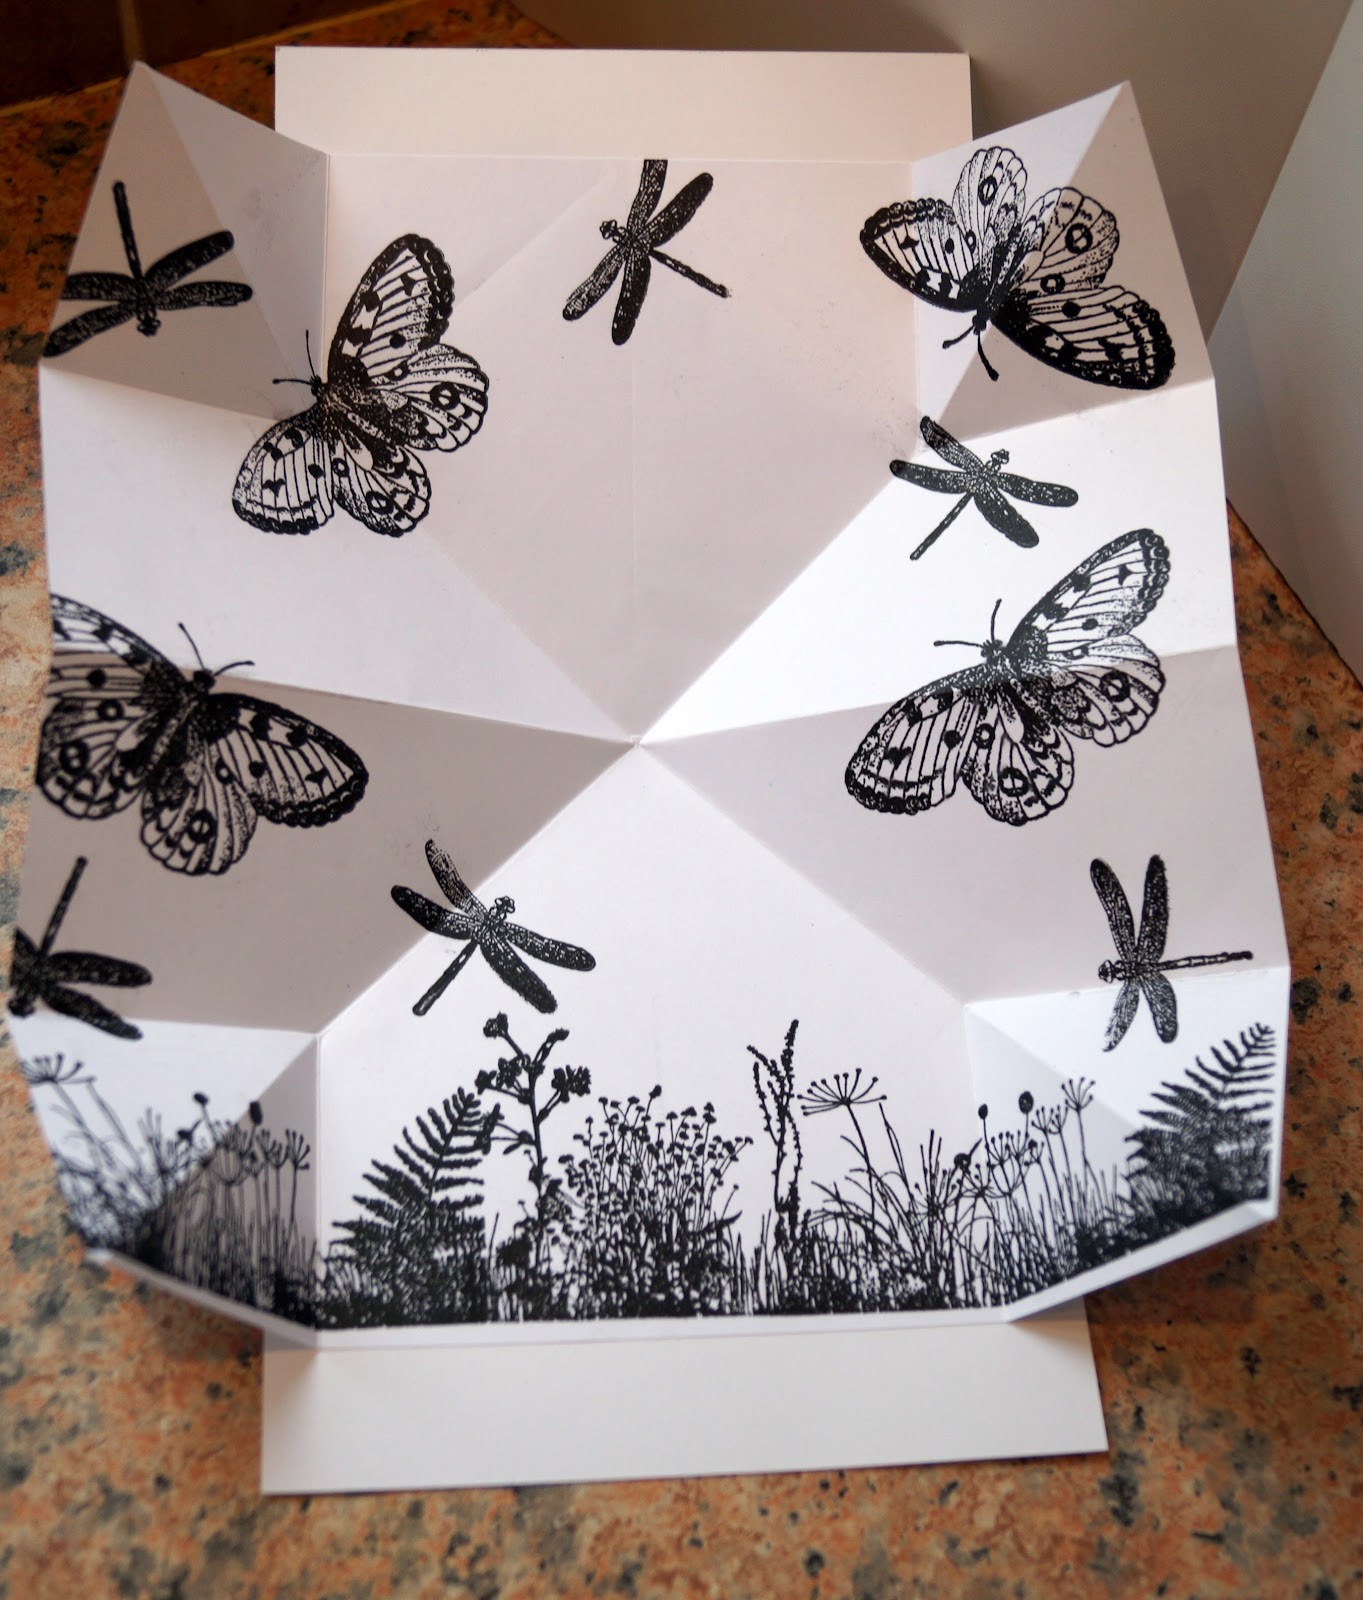
I planned my day to start with a workshop showing us how to decorate a box from the MDF Man then did my shopping, and finished off with a make-and-take at Imagination Crafts.

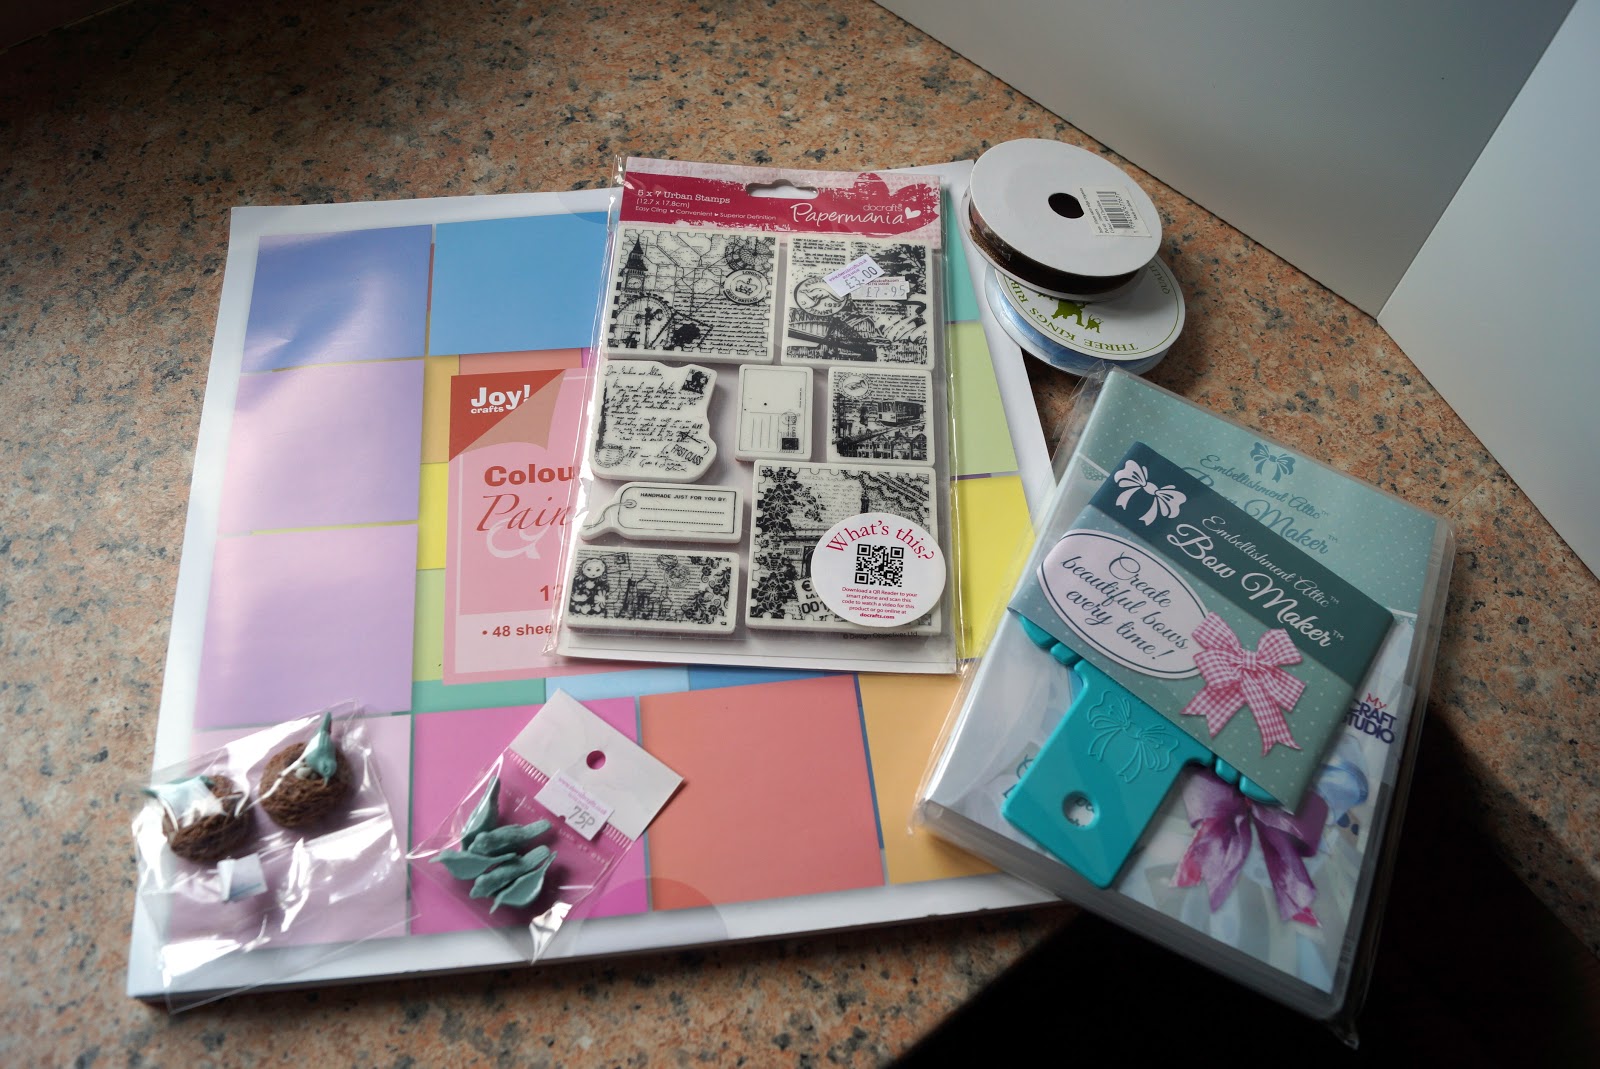
OK, here's my shopping - I've not bothered to photograph the envelopes and cello bags, you all know what they look like! And many apologies, I didn't make a note of the names of the stalls I shopped at.

First of all, a fab bargain bag which will be absolutely great for crafting with the grandchildren. There are literally dozens of packs of Crafty Bitz embellishments and gems, about 6 packs of card blanks and two 12 x 12 paper pads. All packed into a strong fabric tote bag for just £5! 


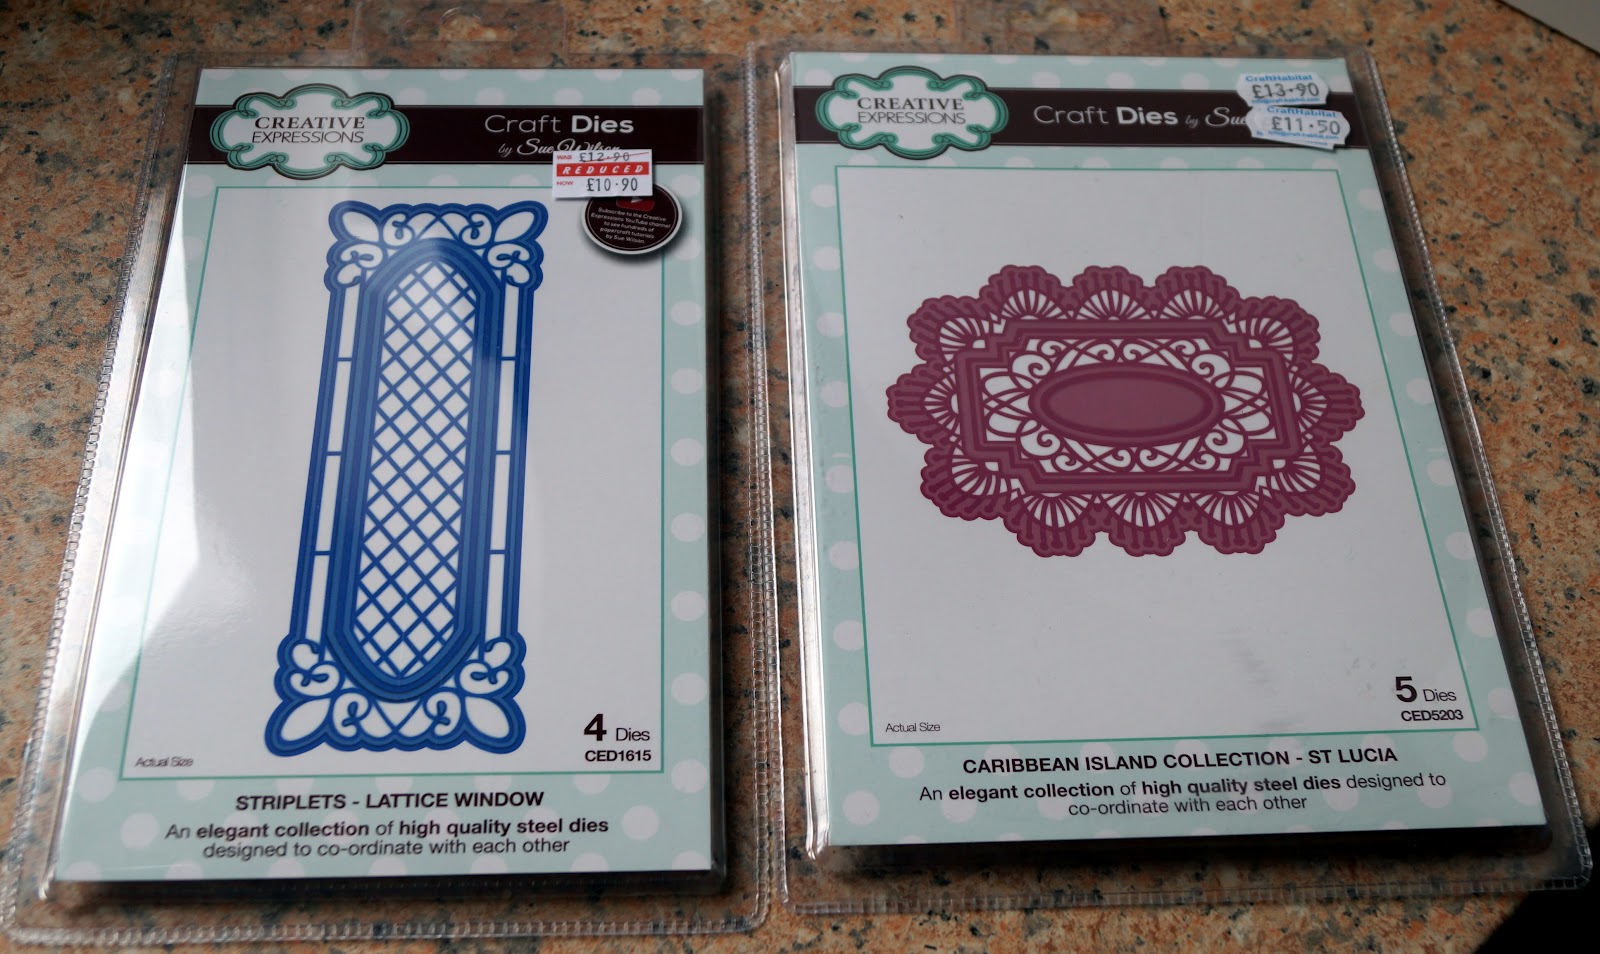
Next, some dies I've had my eye on for a while, I wanted to see them in real life before deciding exactly which I needed


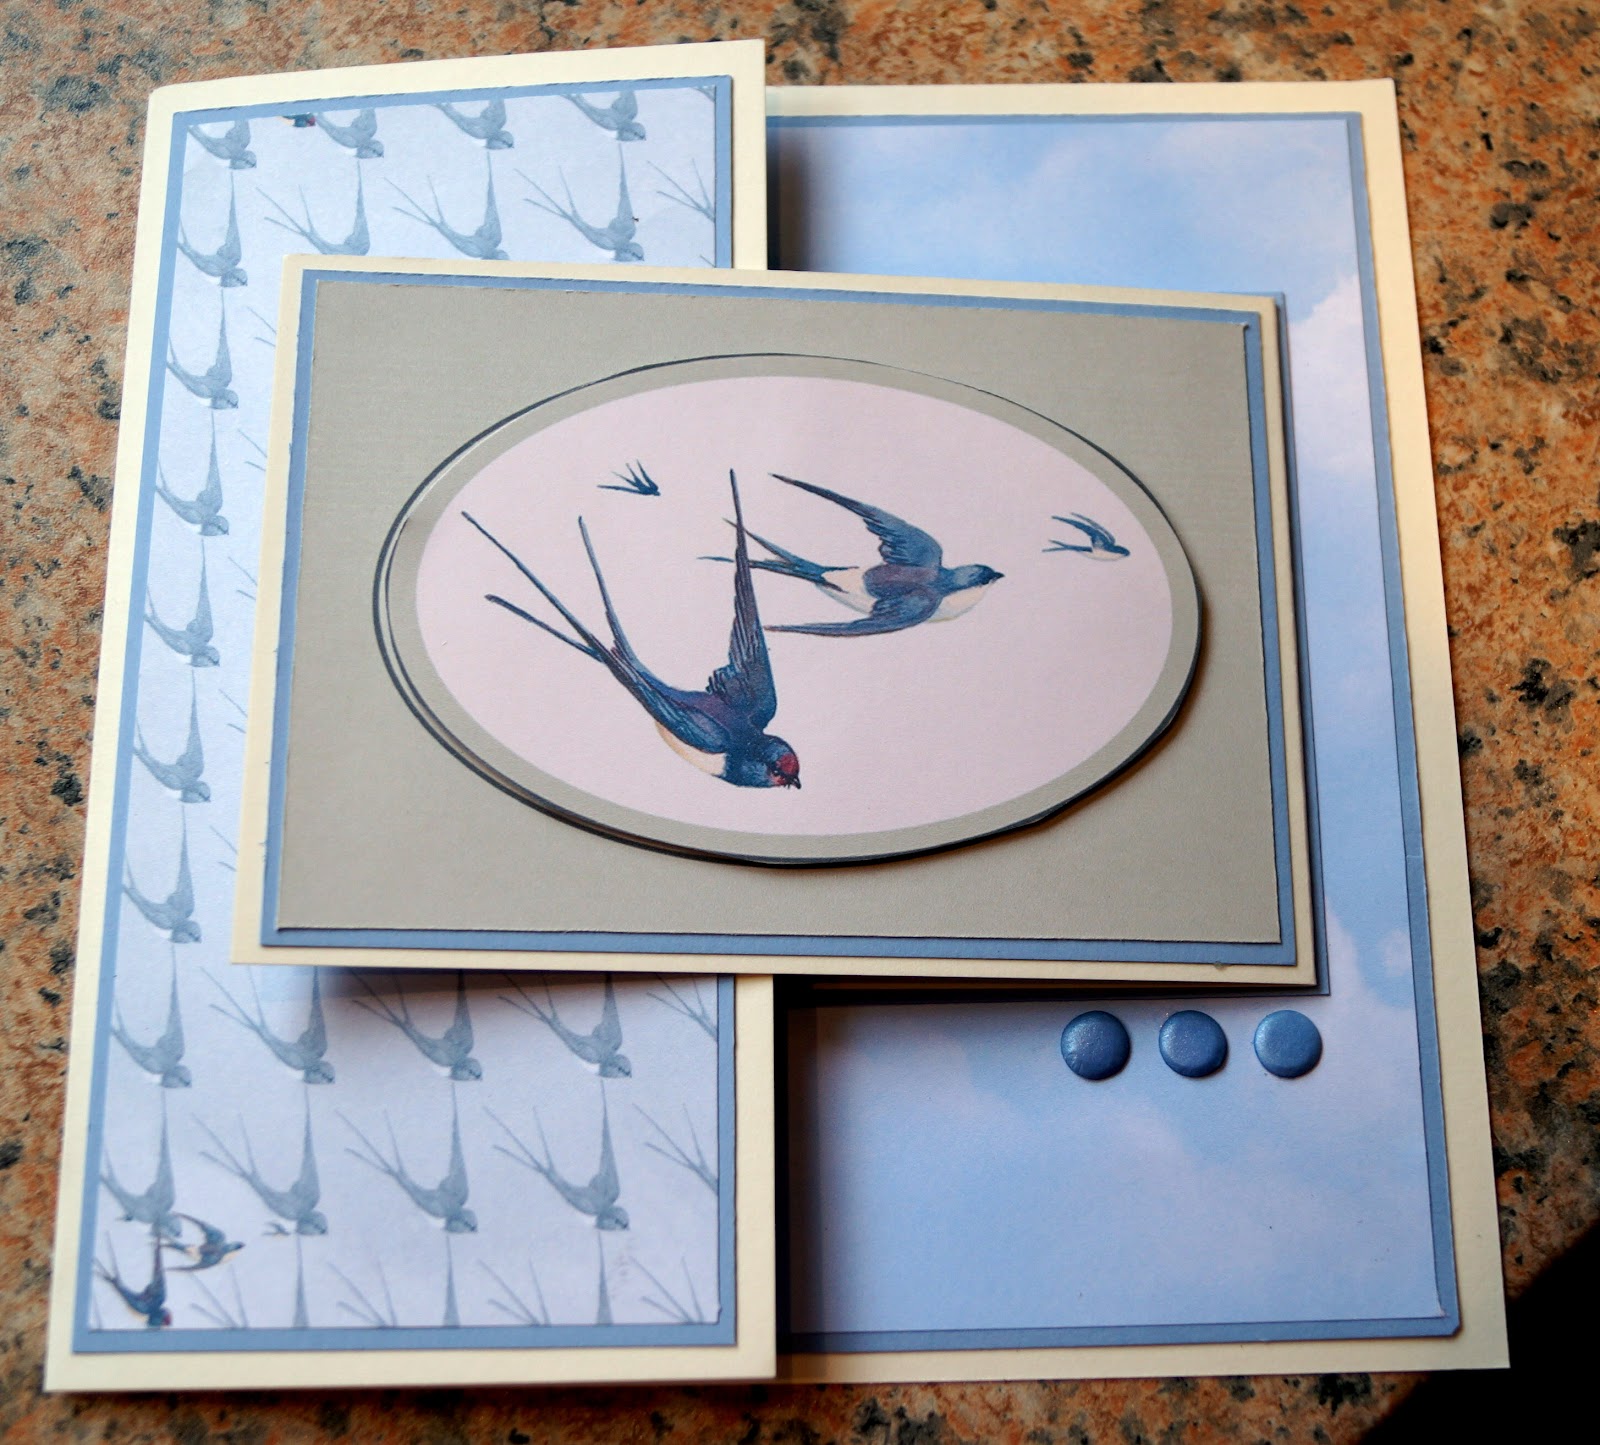
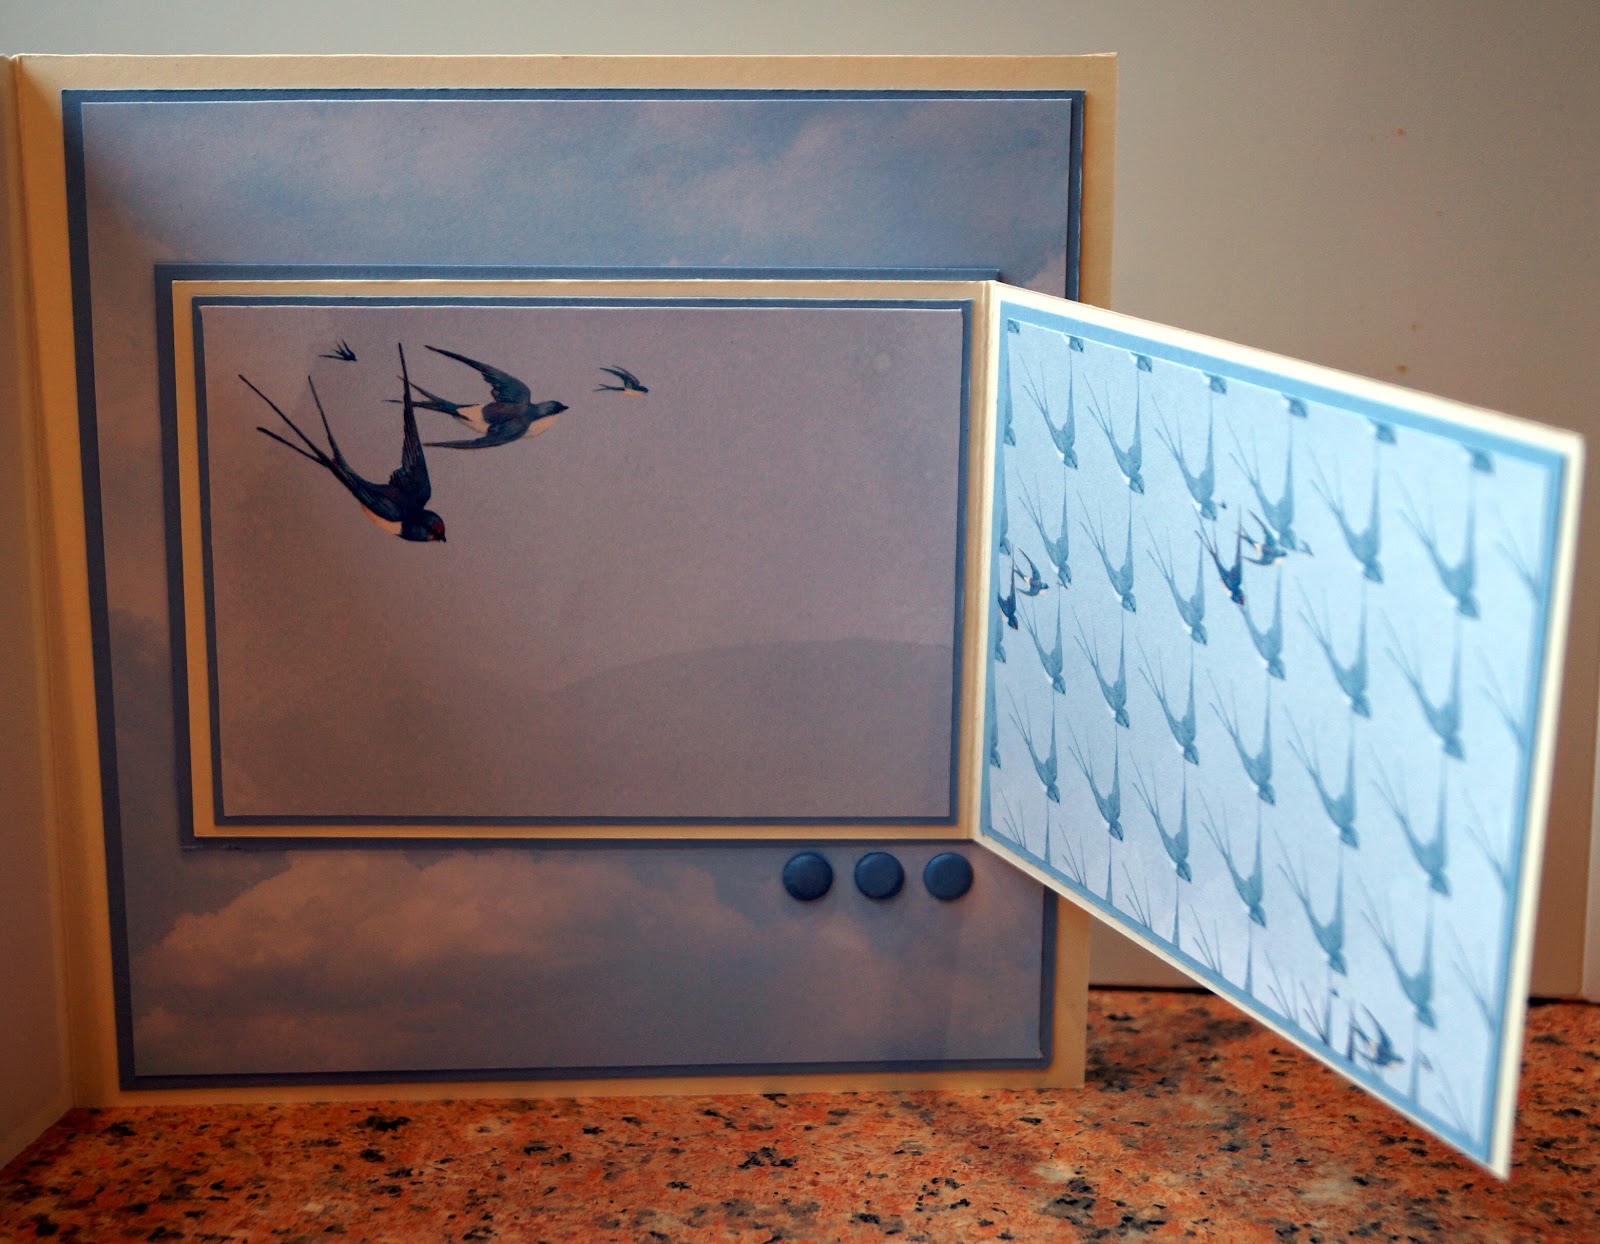
I was also looking for a replacement bow maker, my old one having lost a couple of teeth. The new one came with a DVD and two rolls of ribbon. The pastel paper was also on my shopping list - my only unplanned purchases were the gorgeous set of stamps, featuring London, Sydney and Paris, and the sweet little bird and nest embellishments.


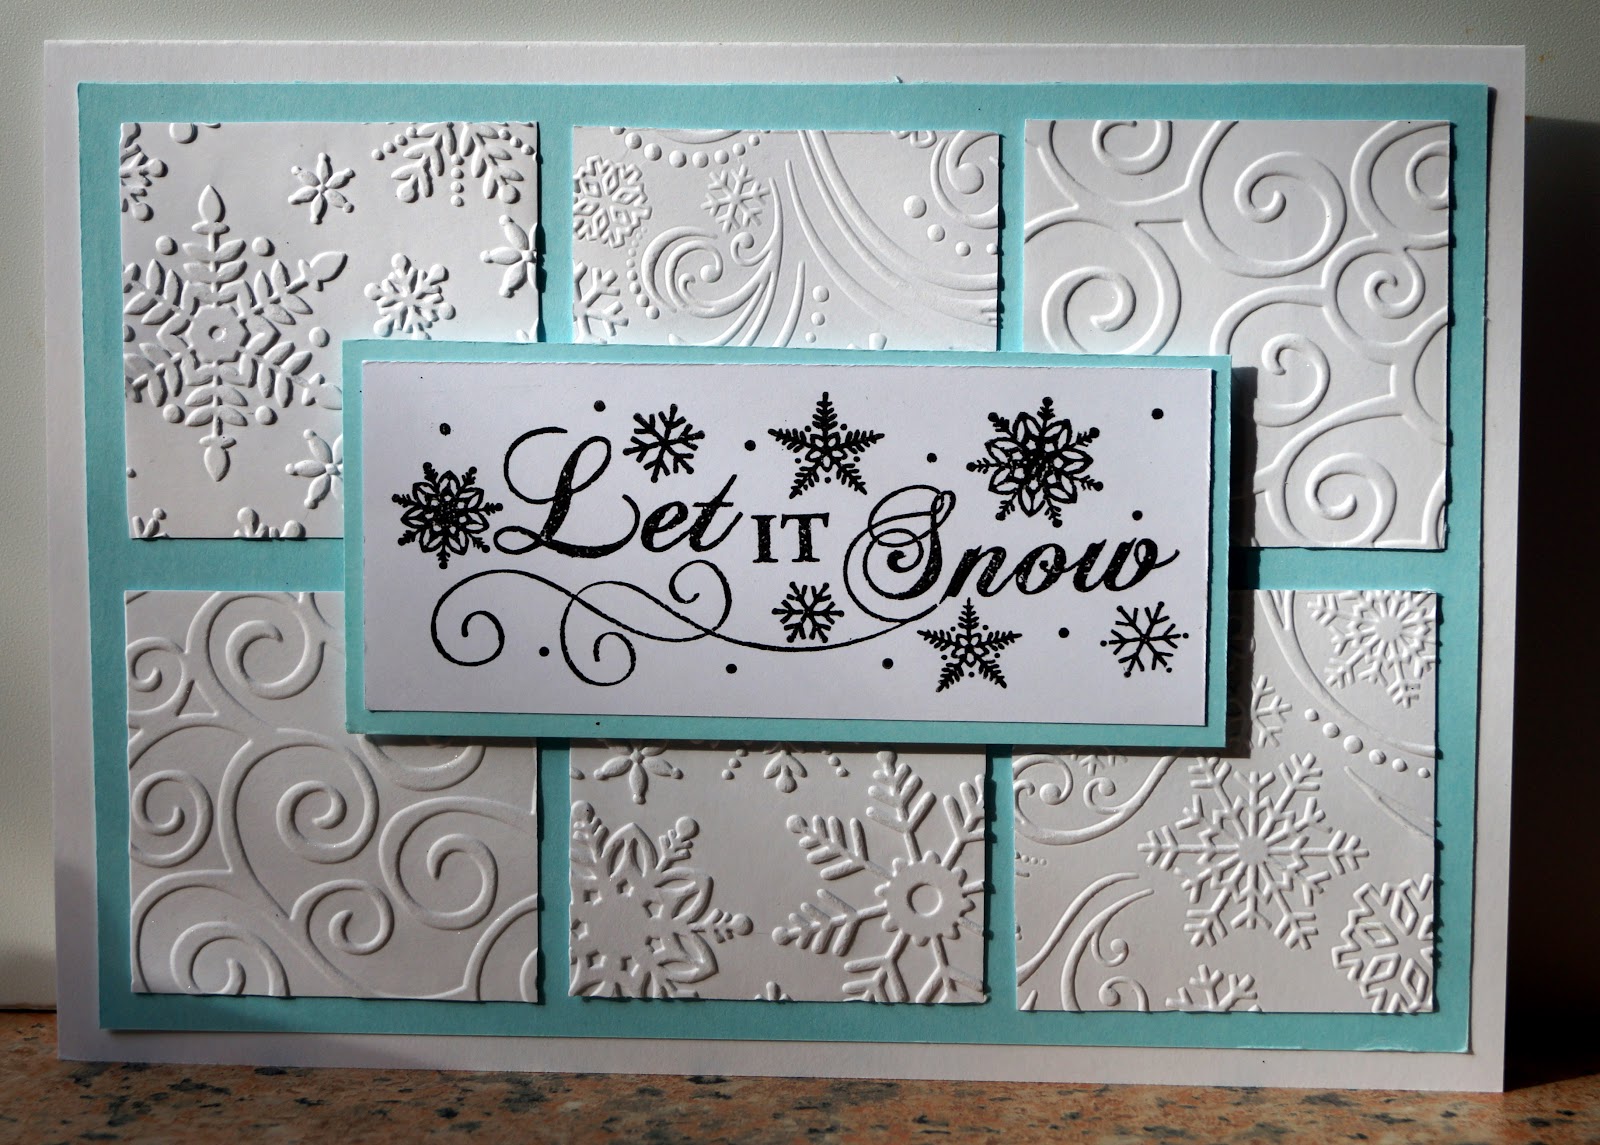
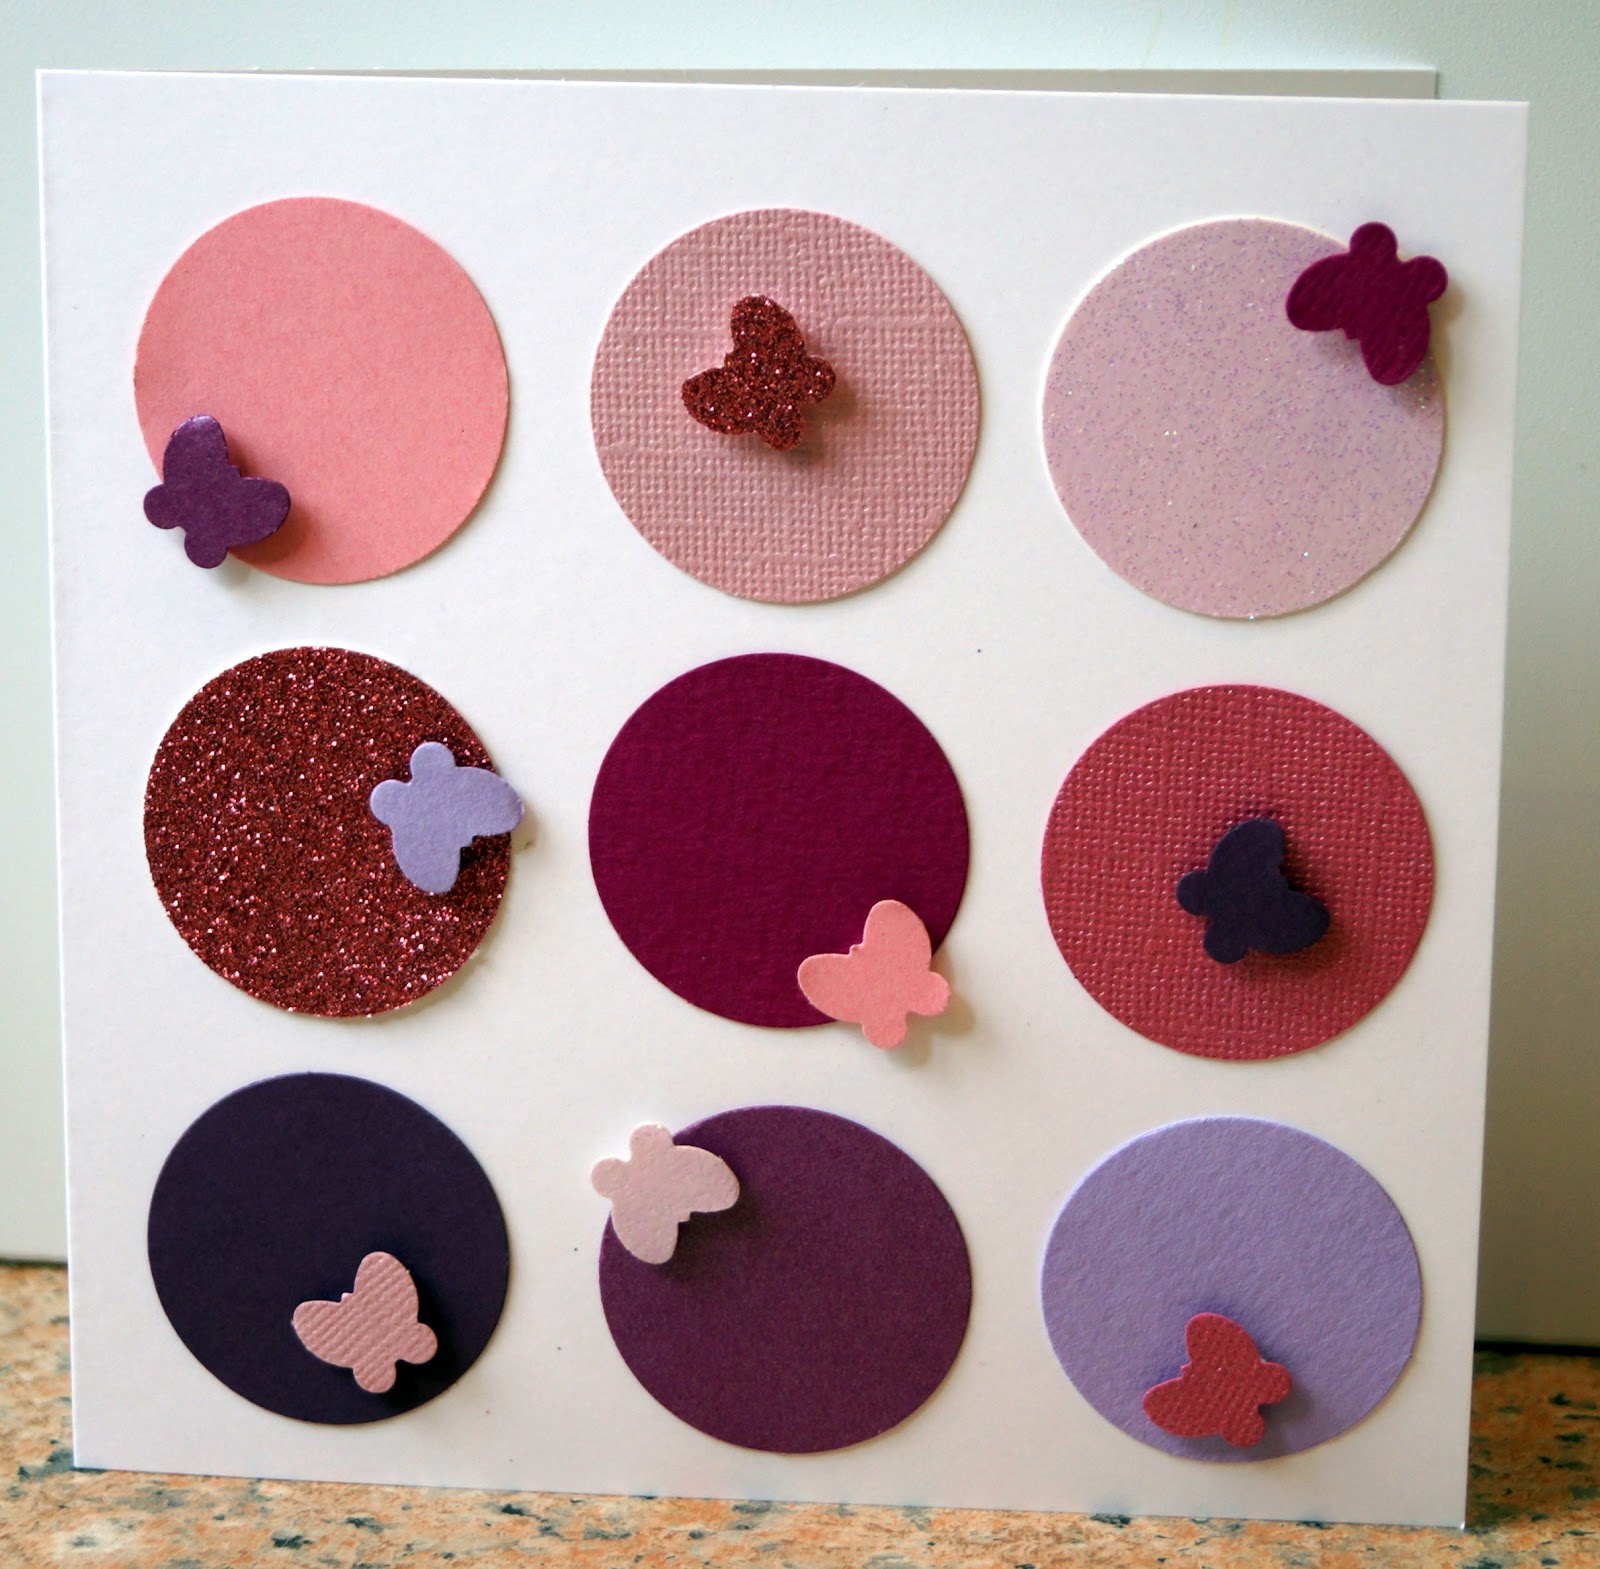
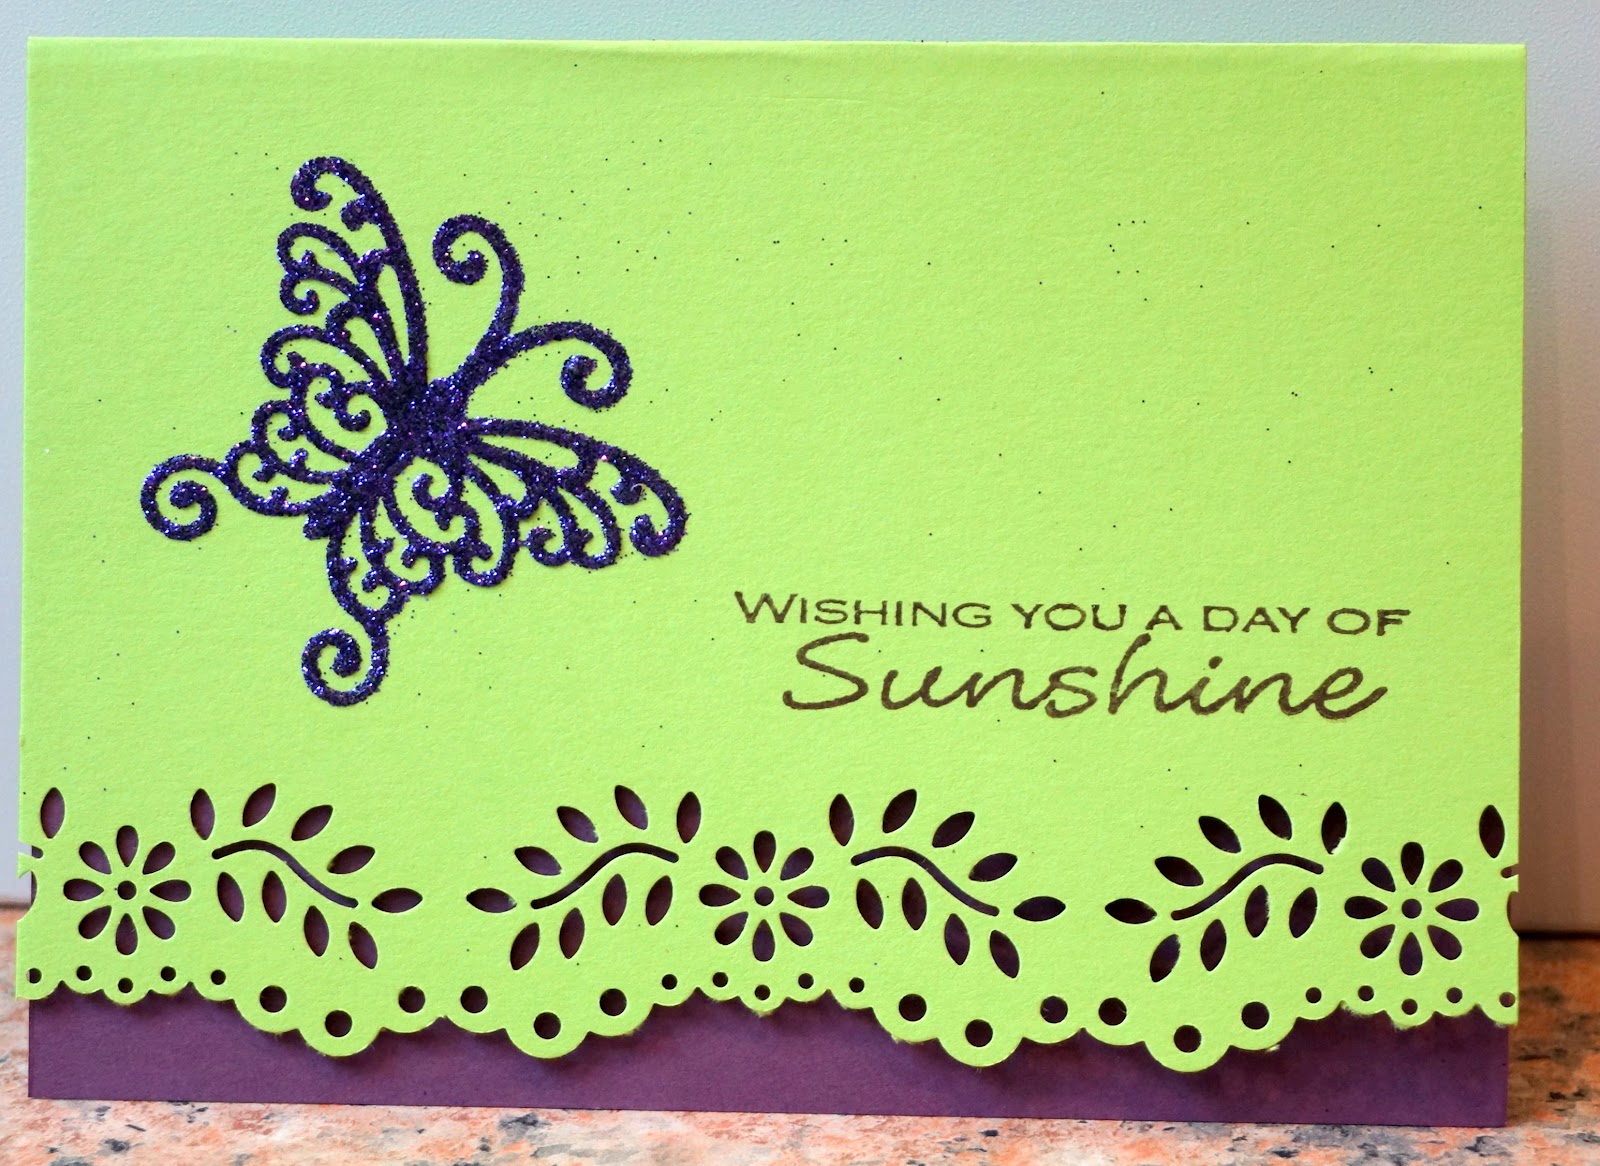
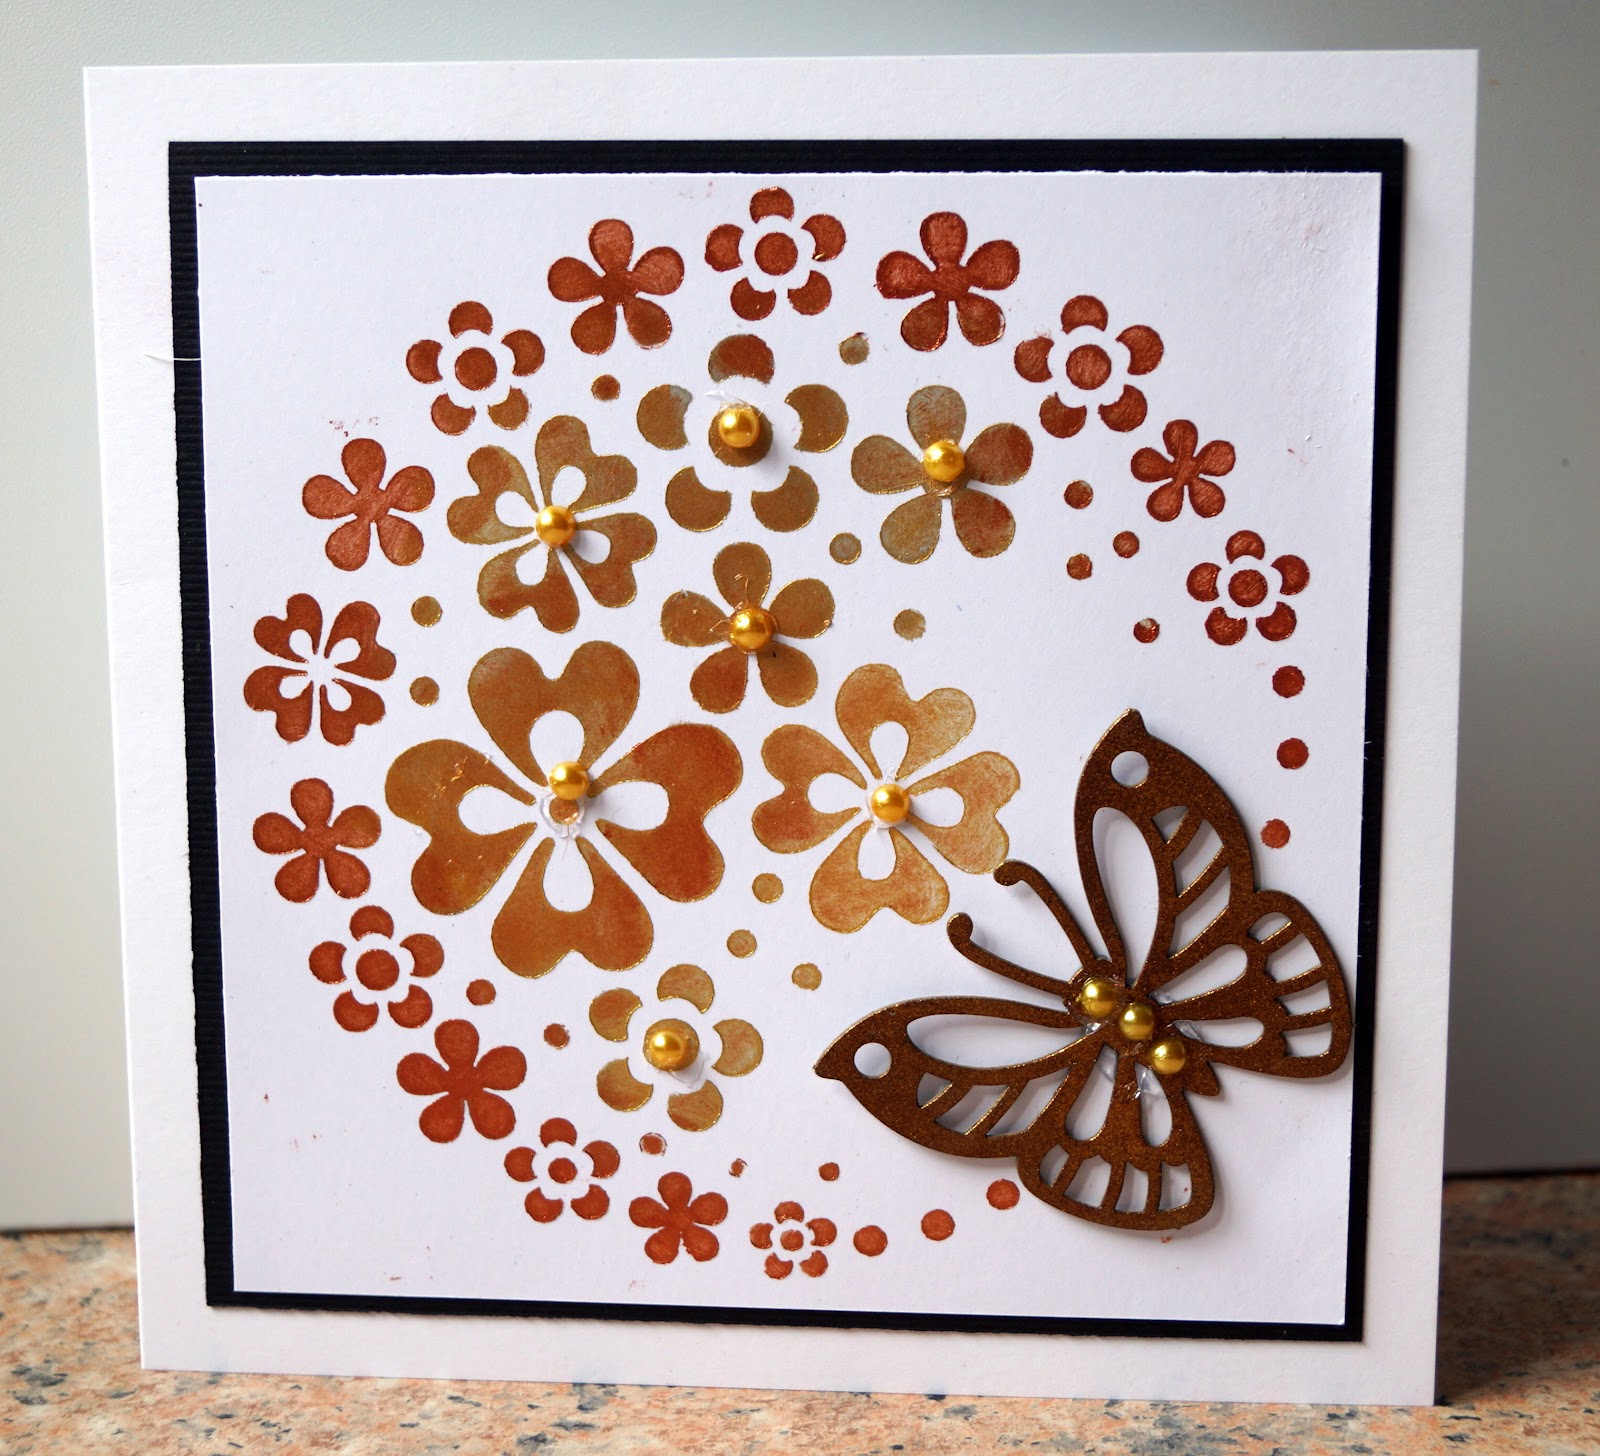
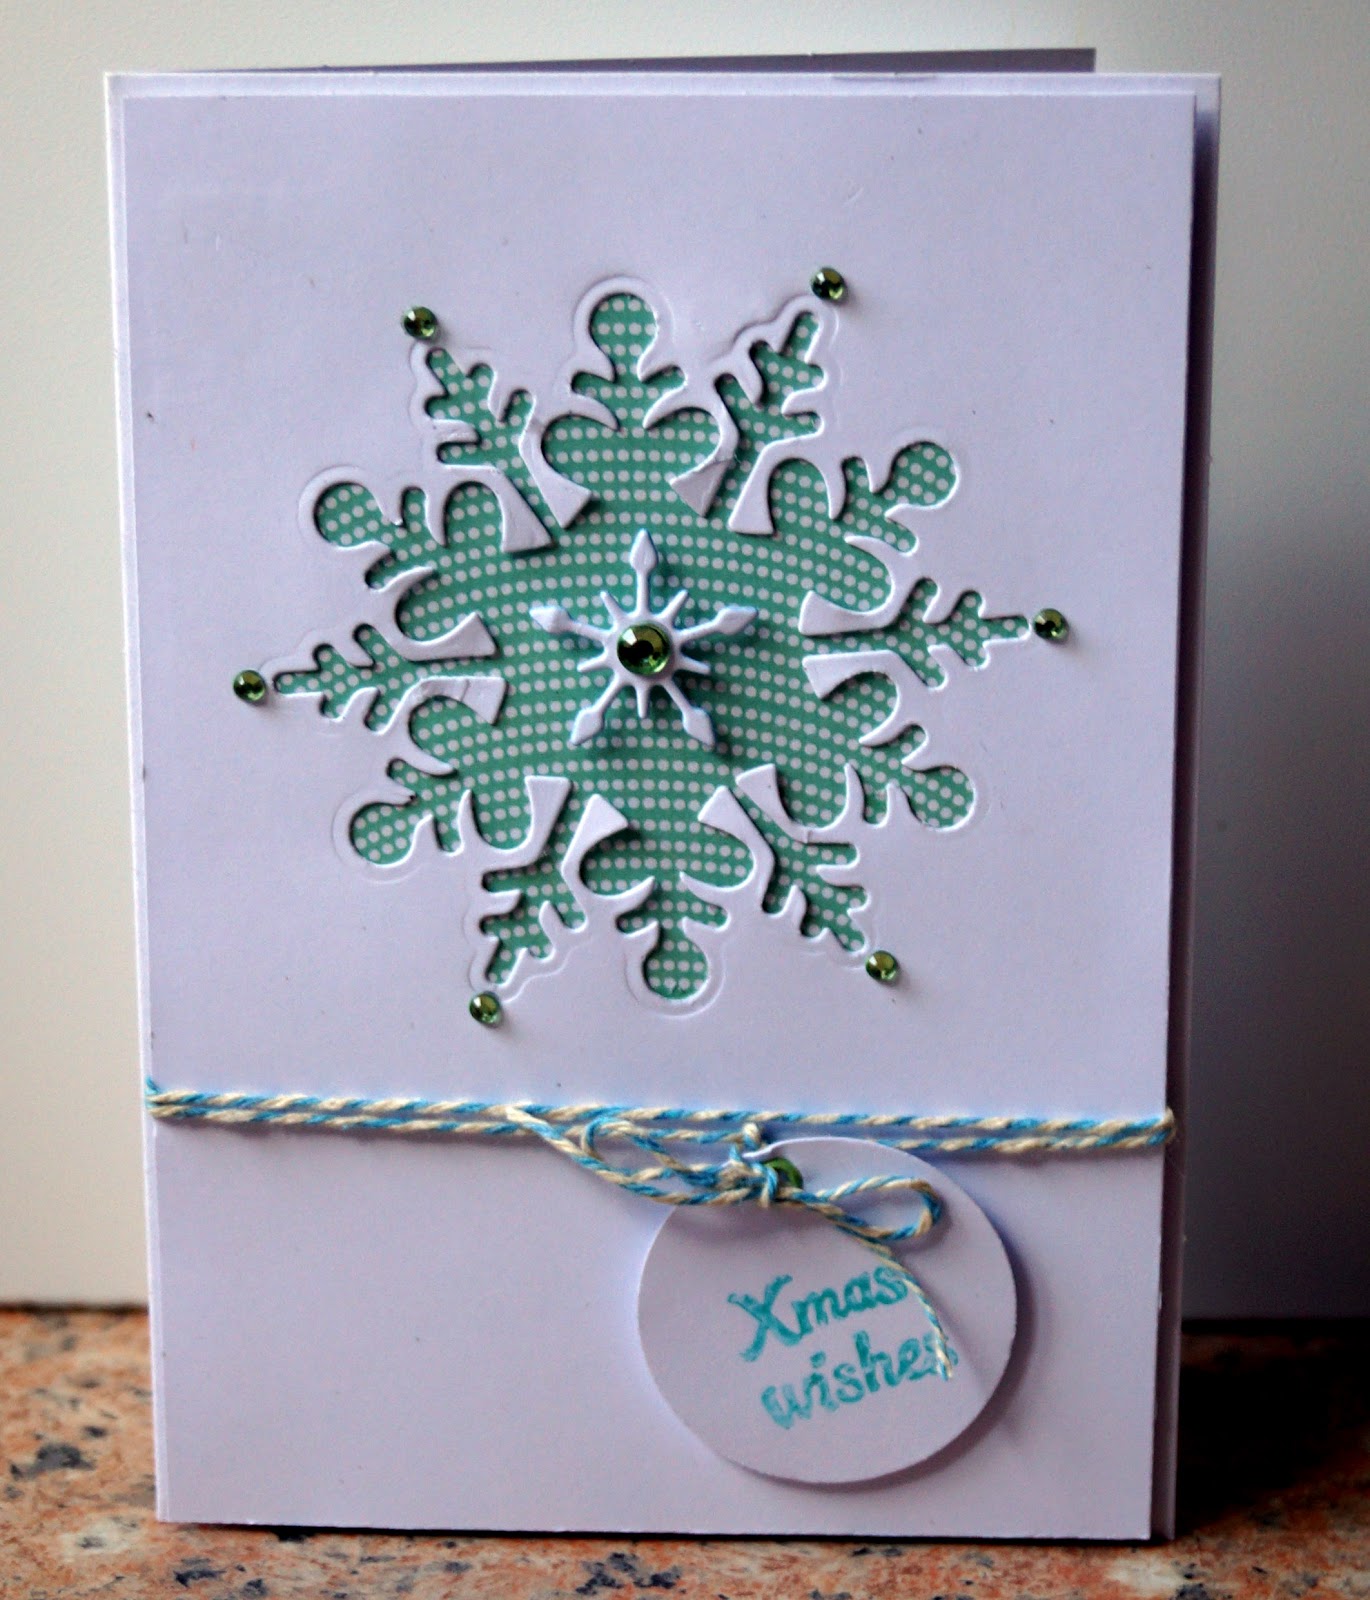
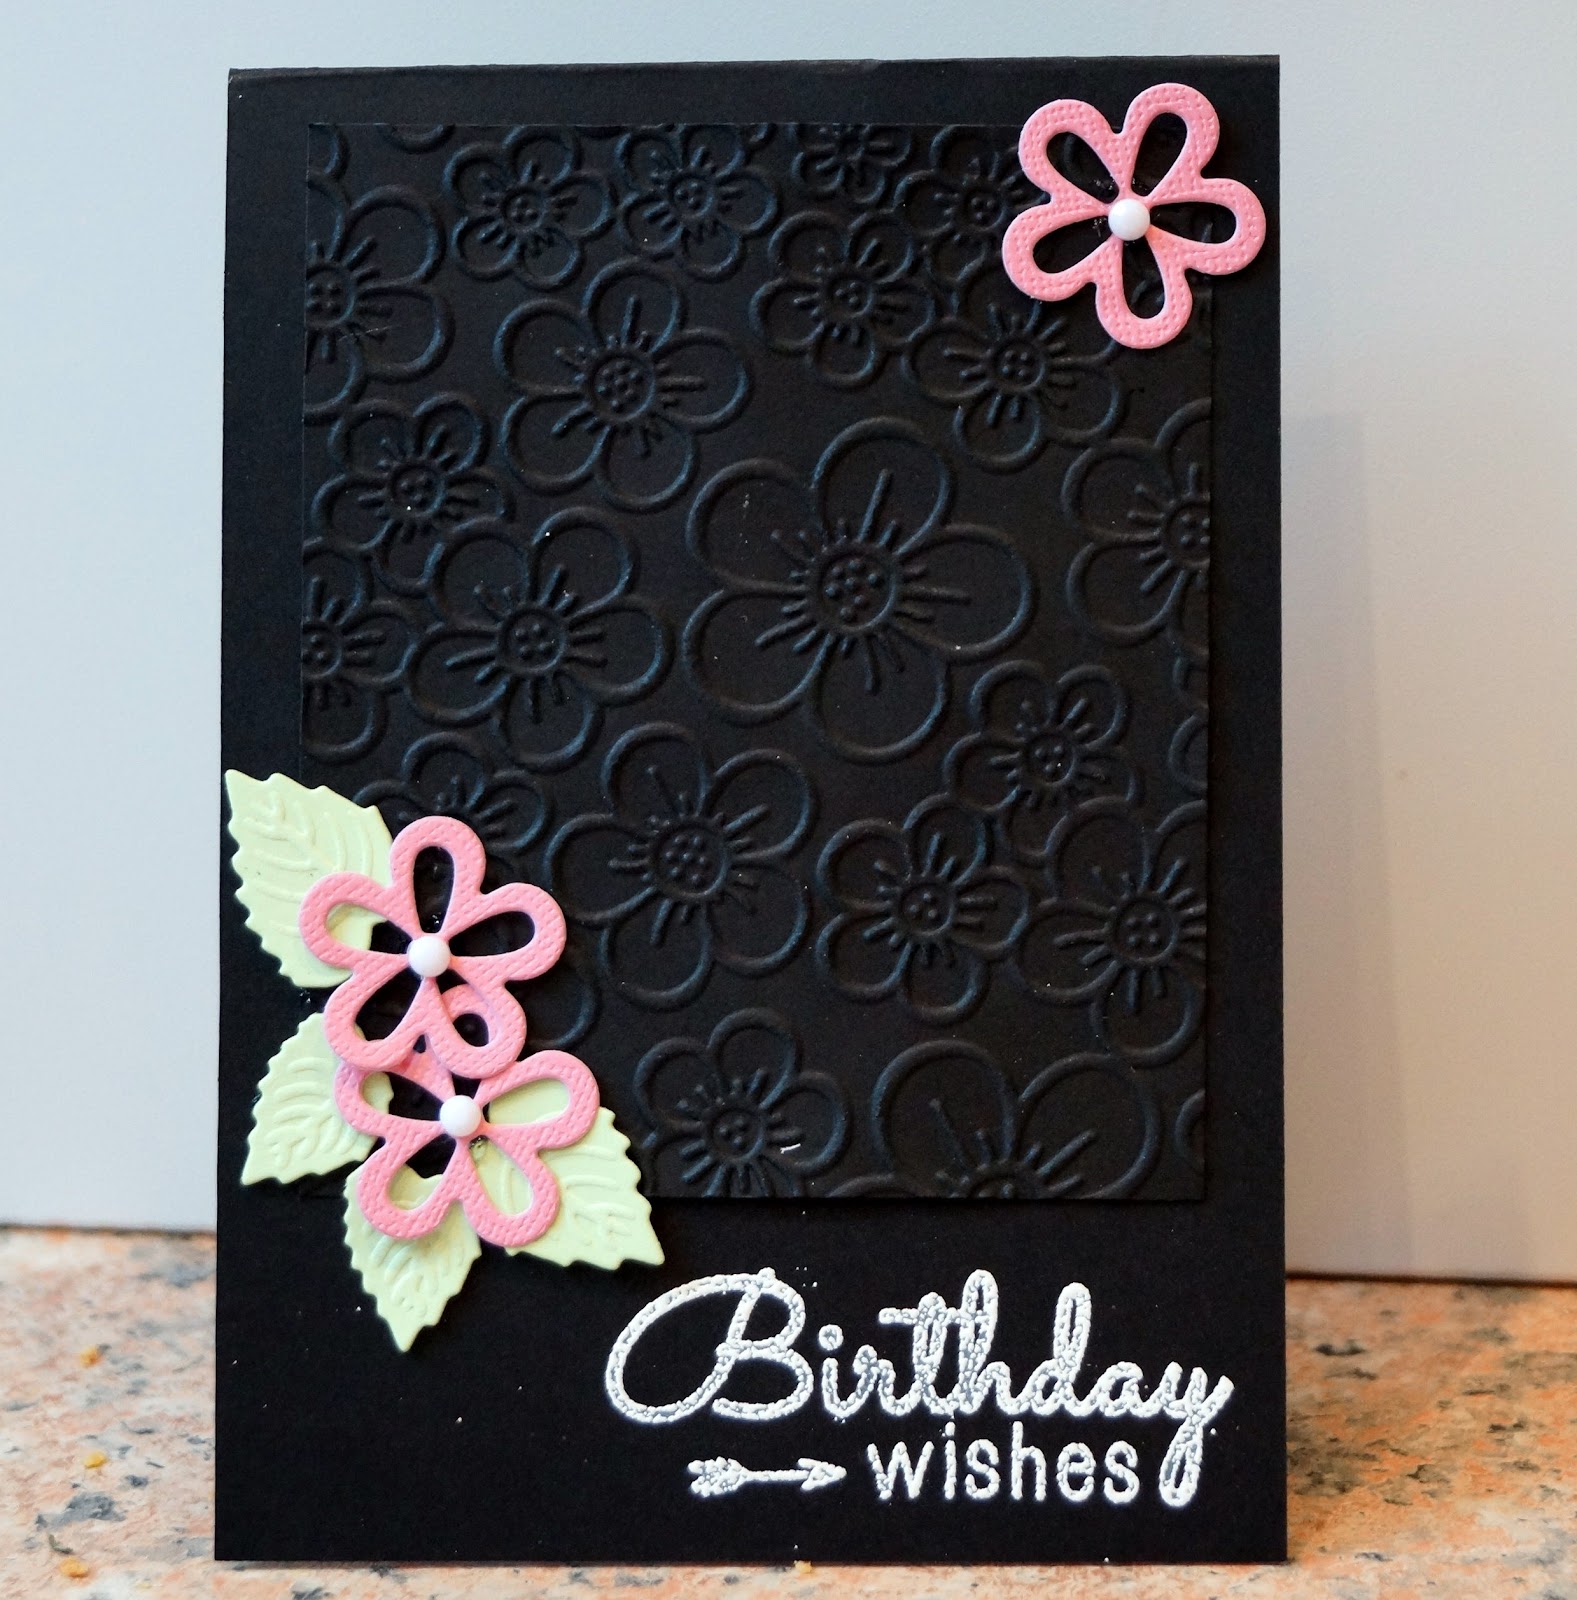
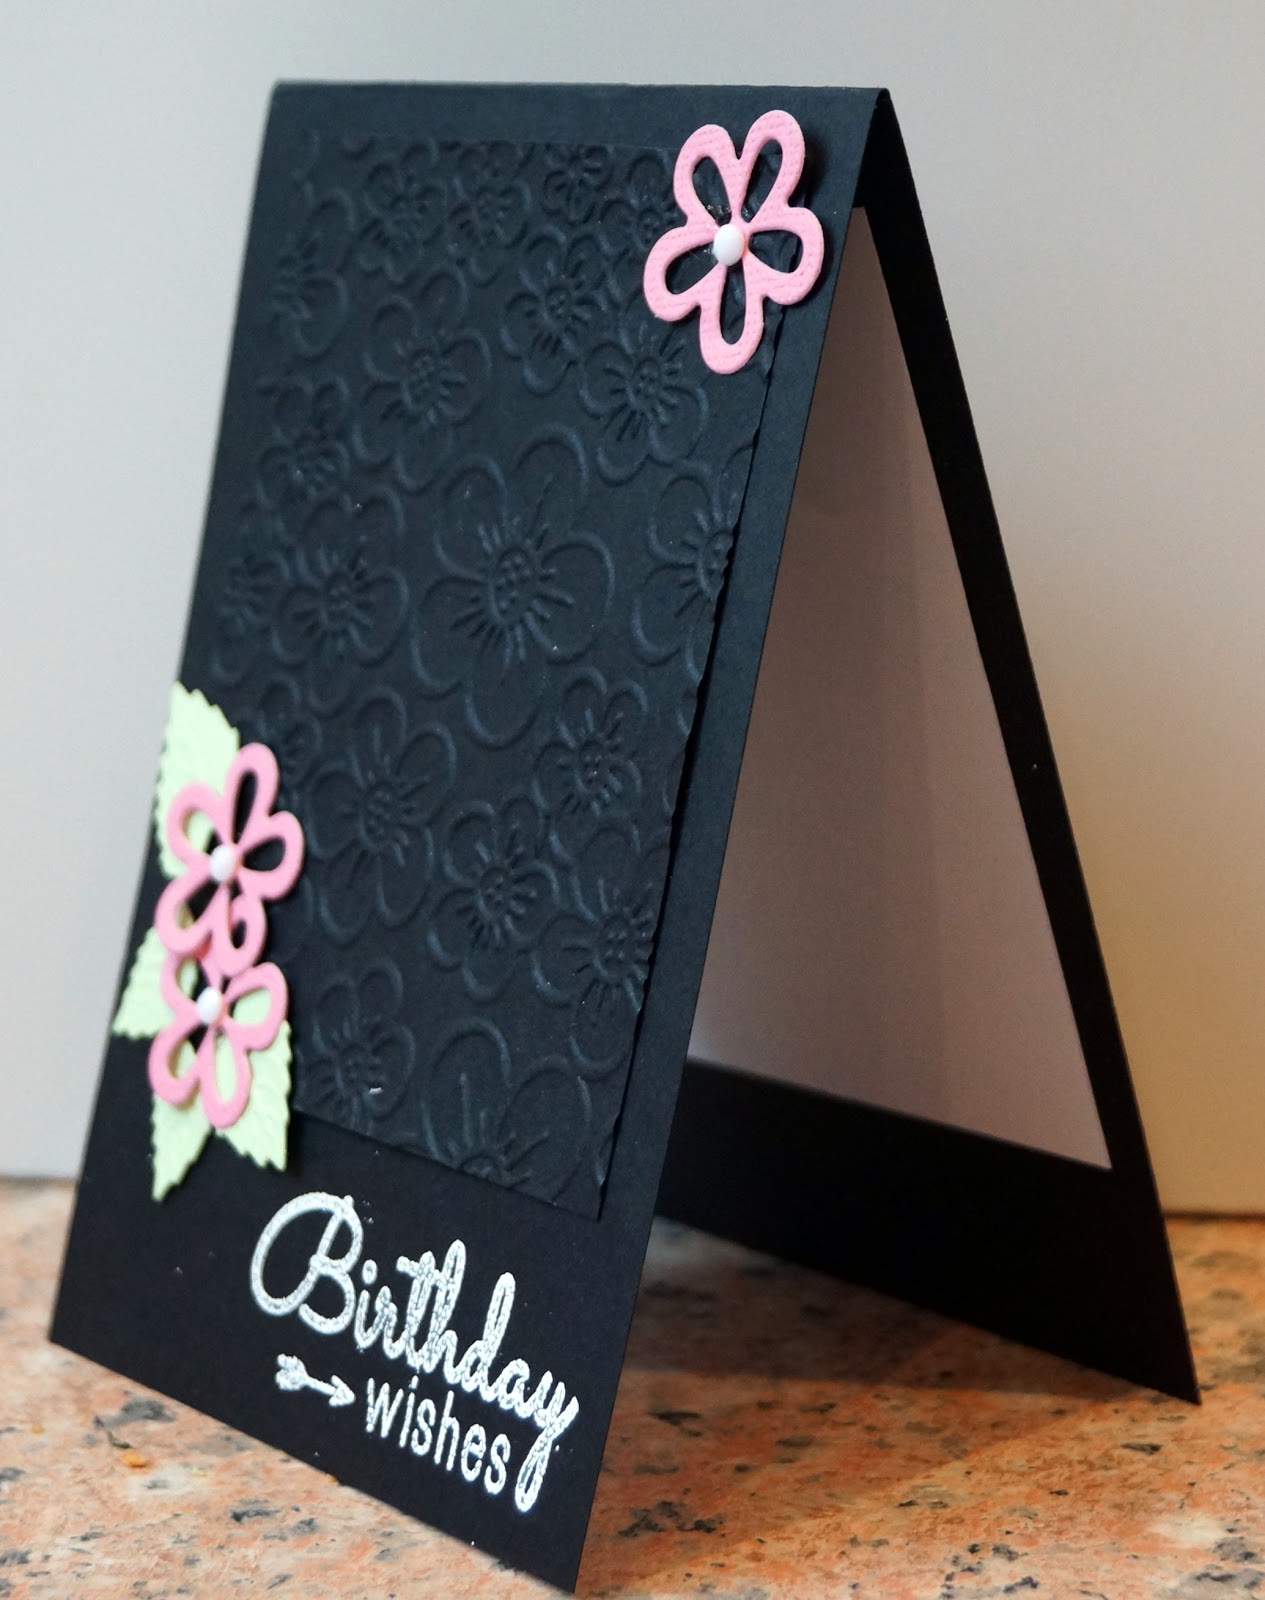
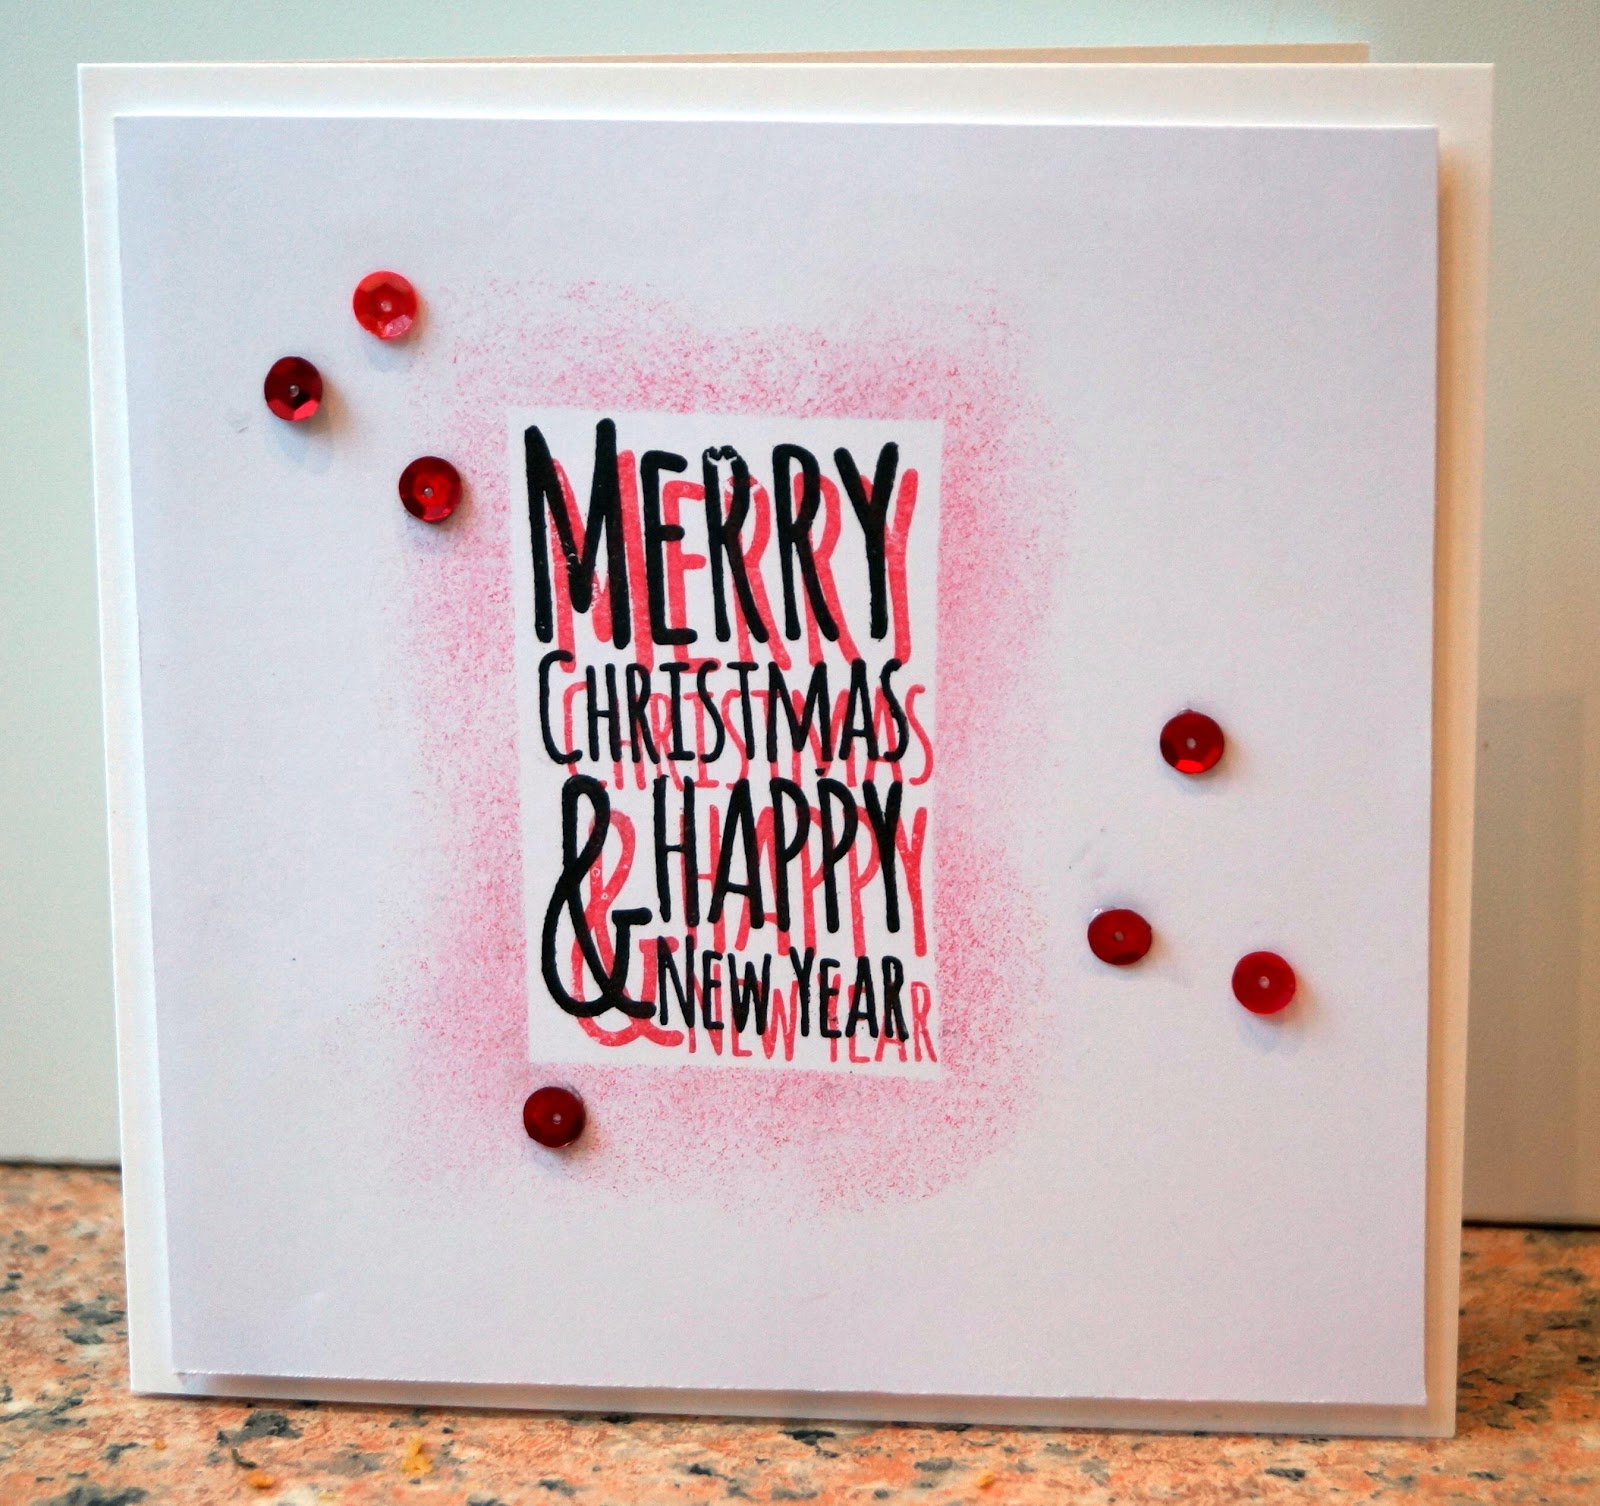
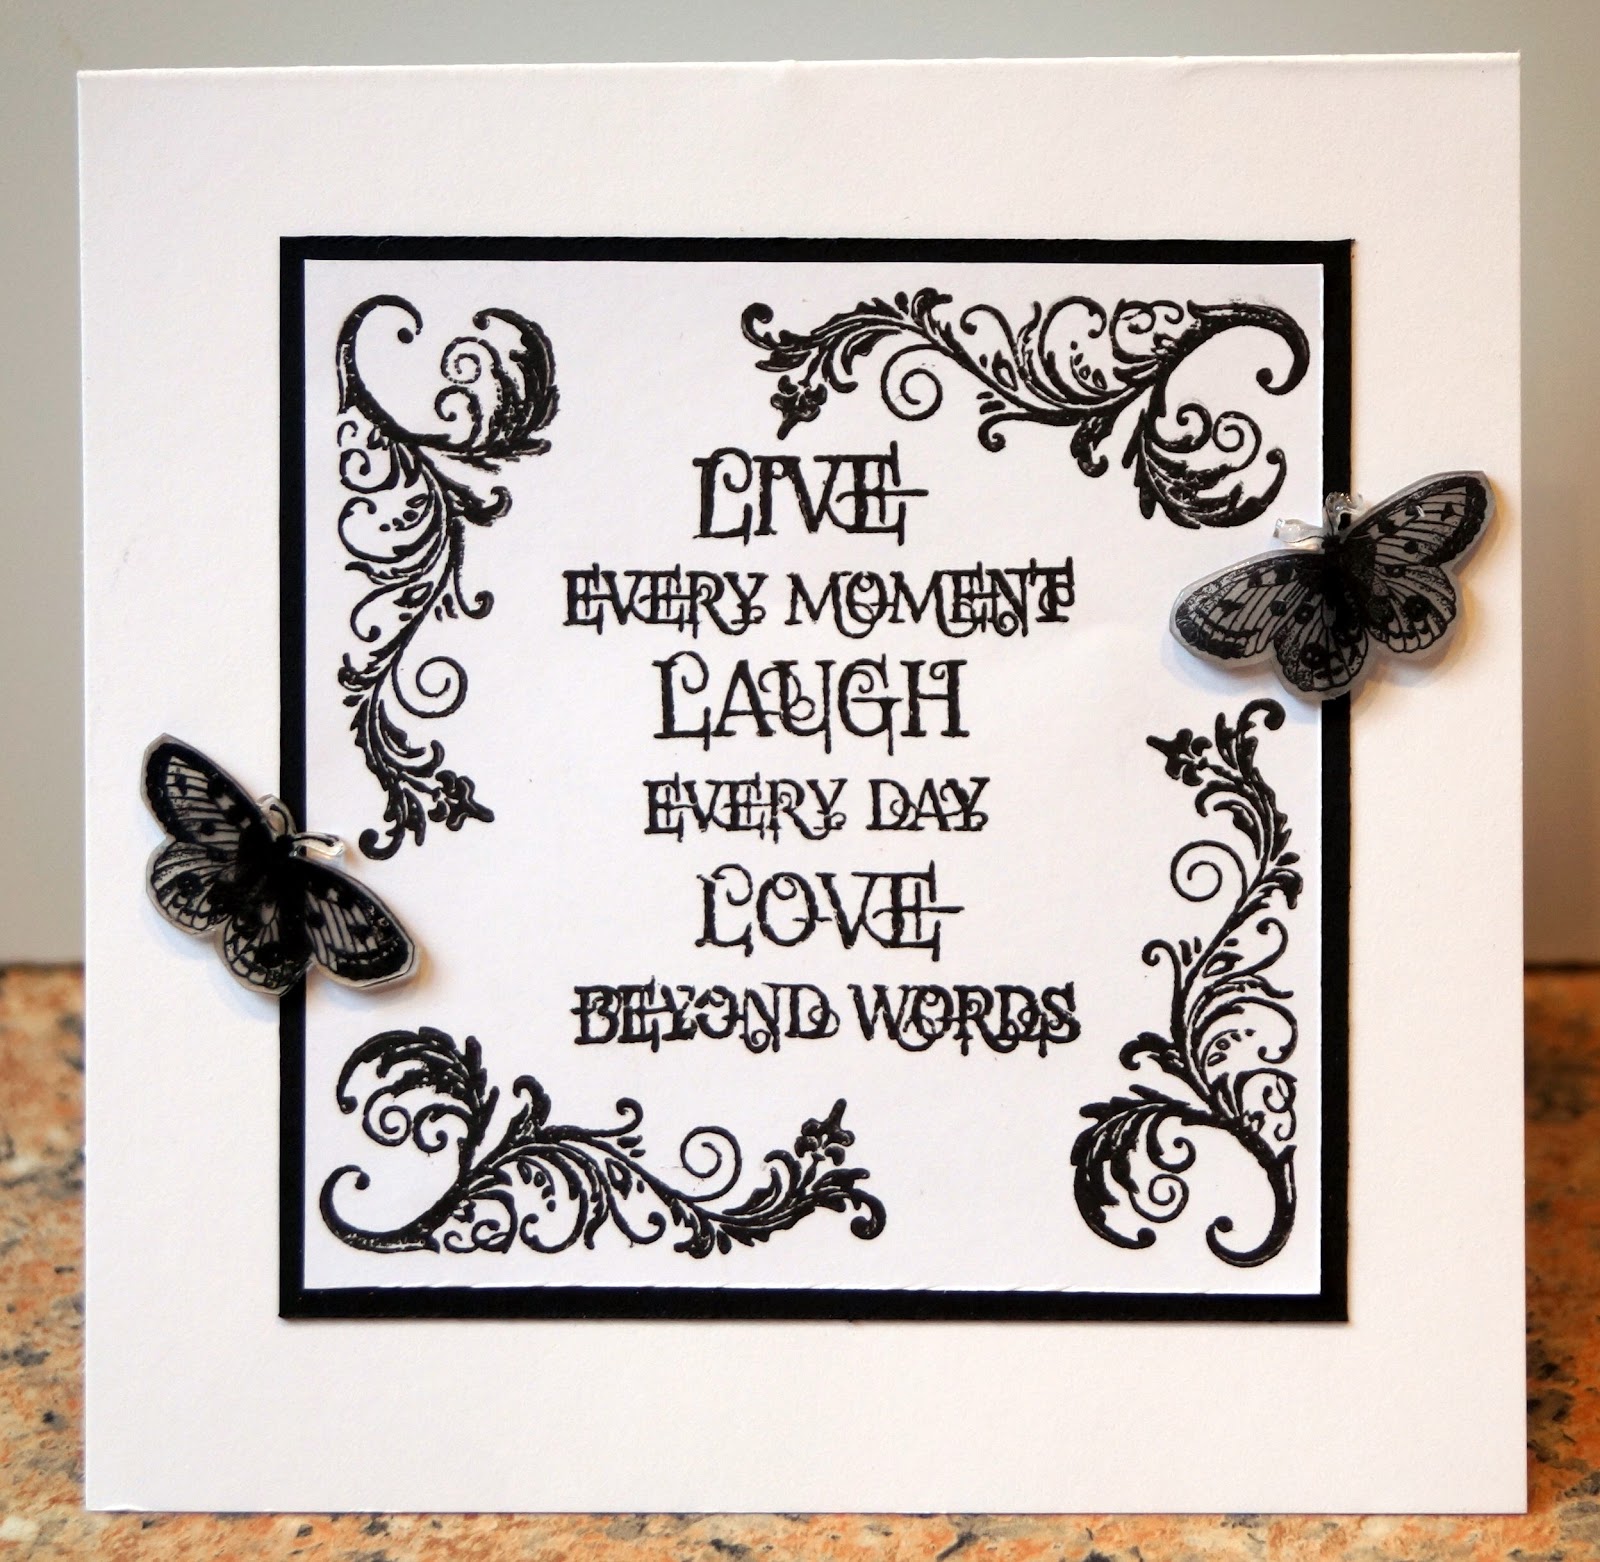
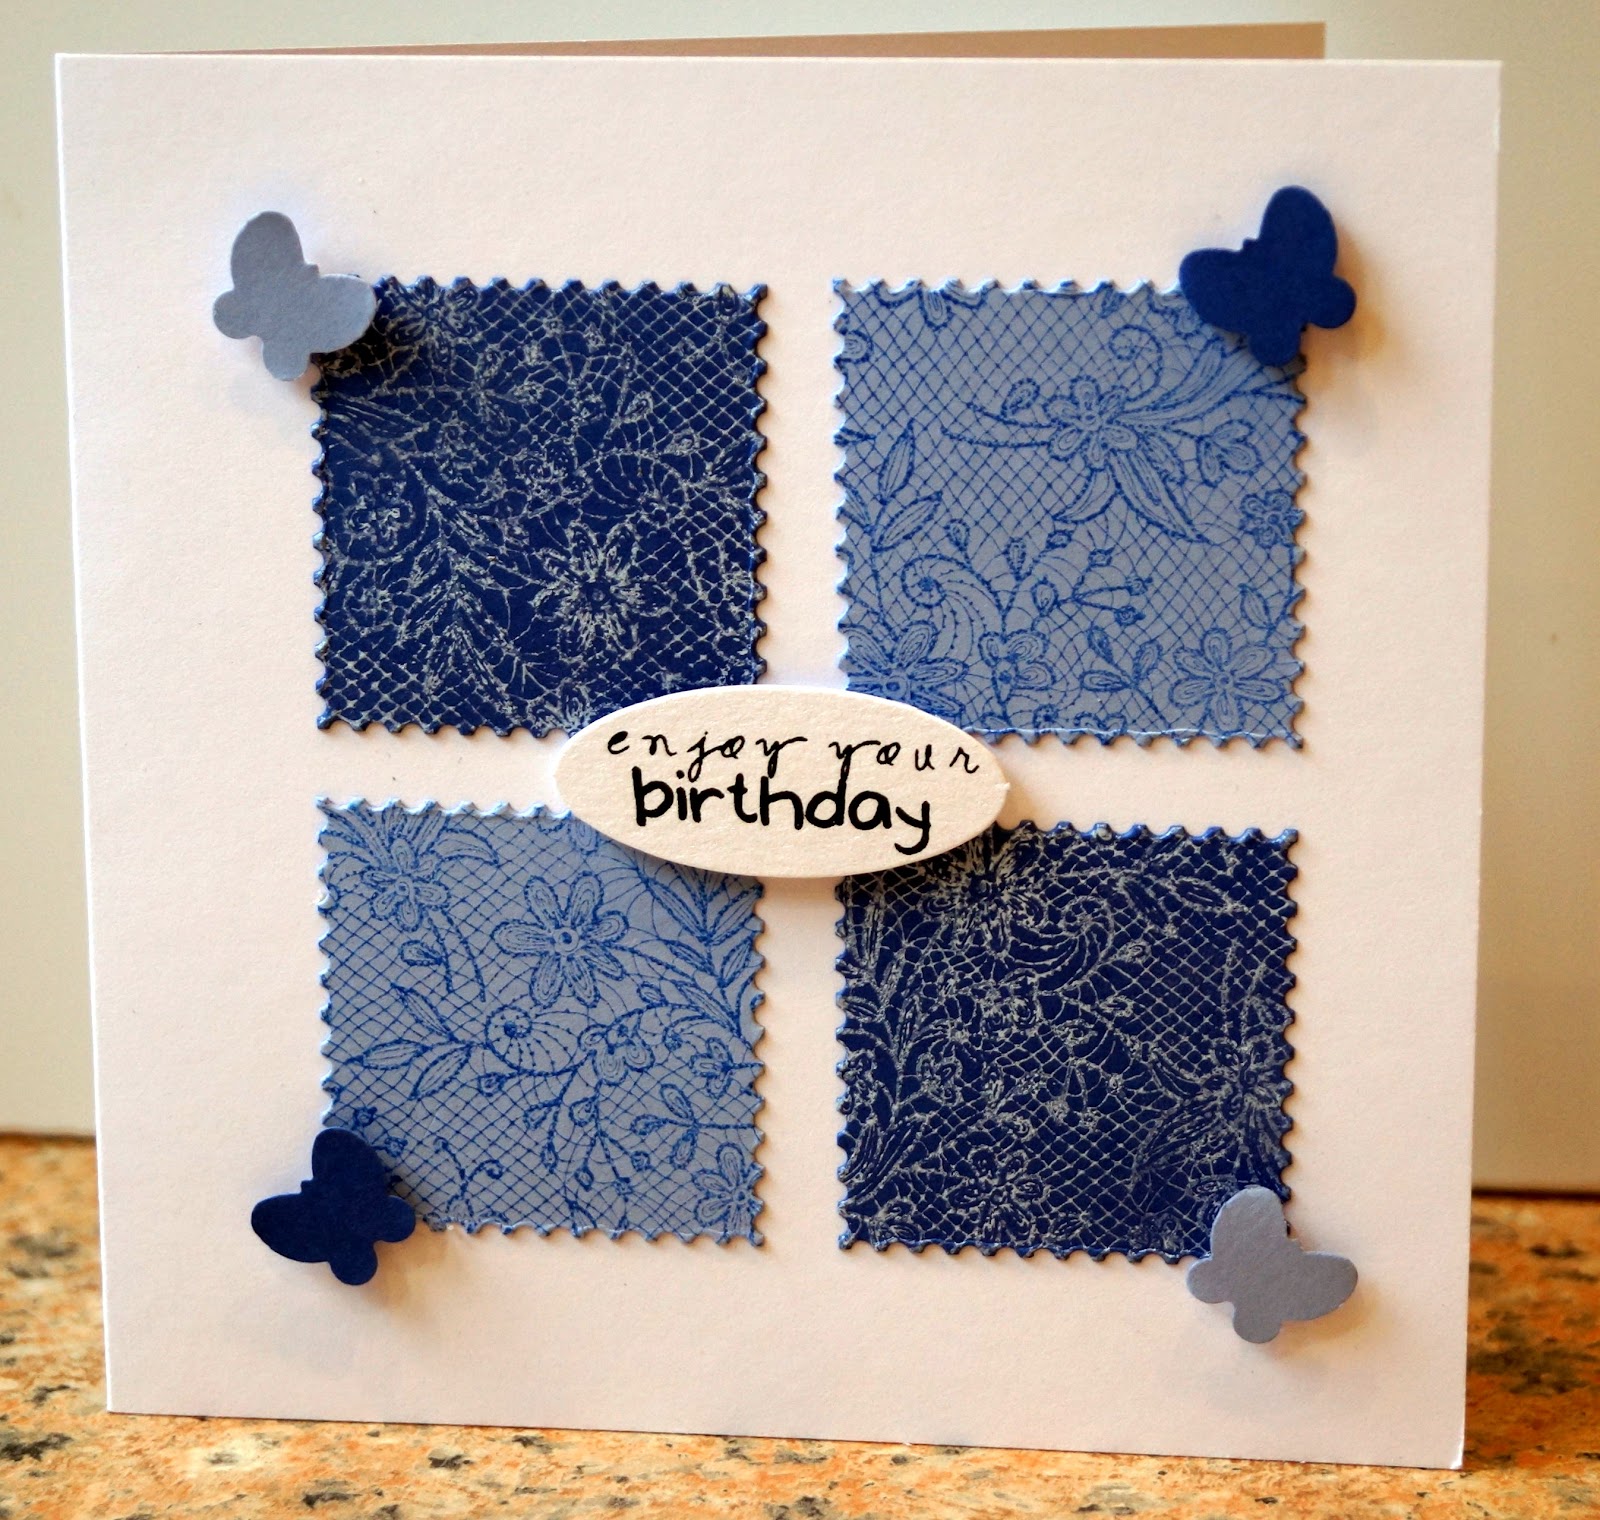
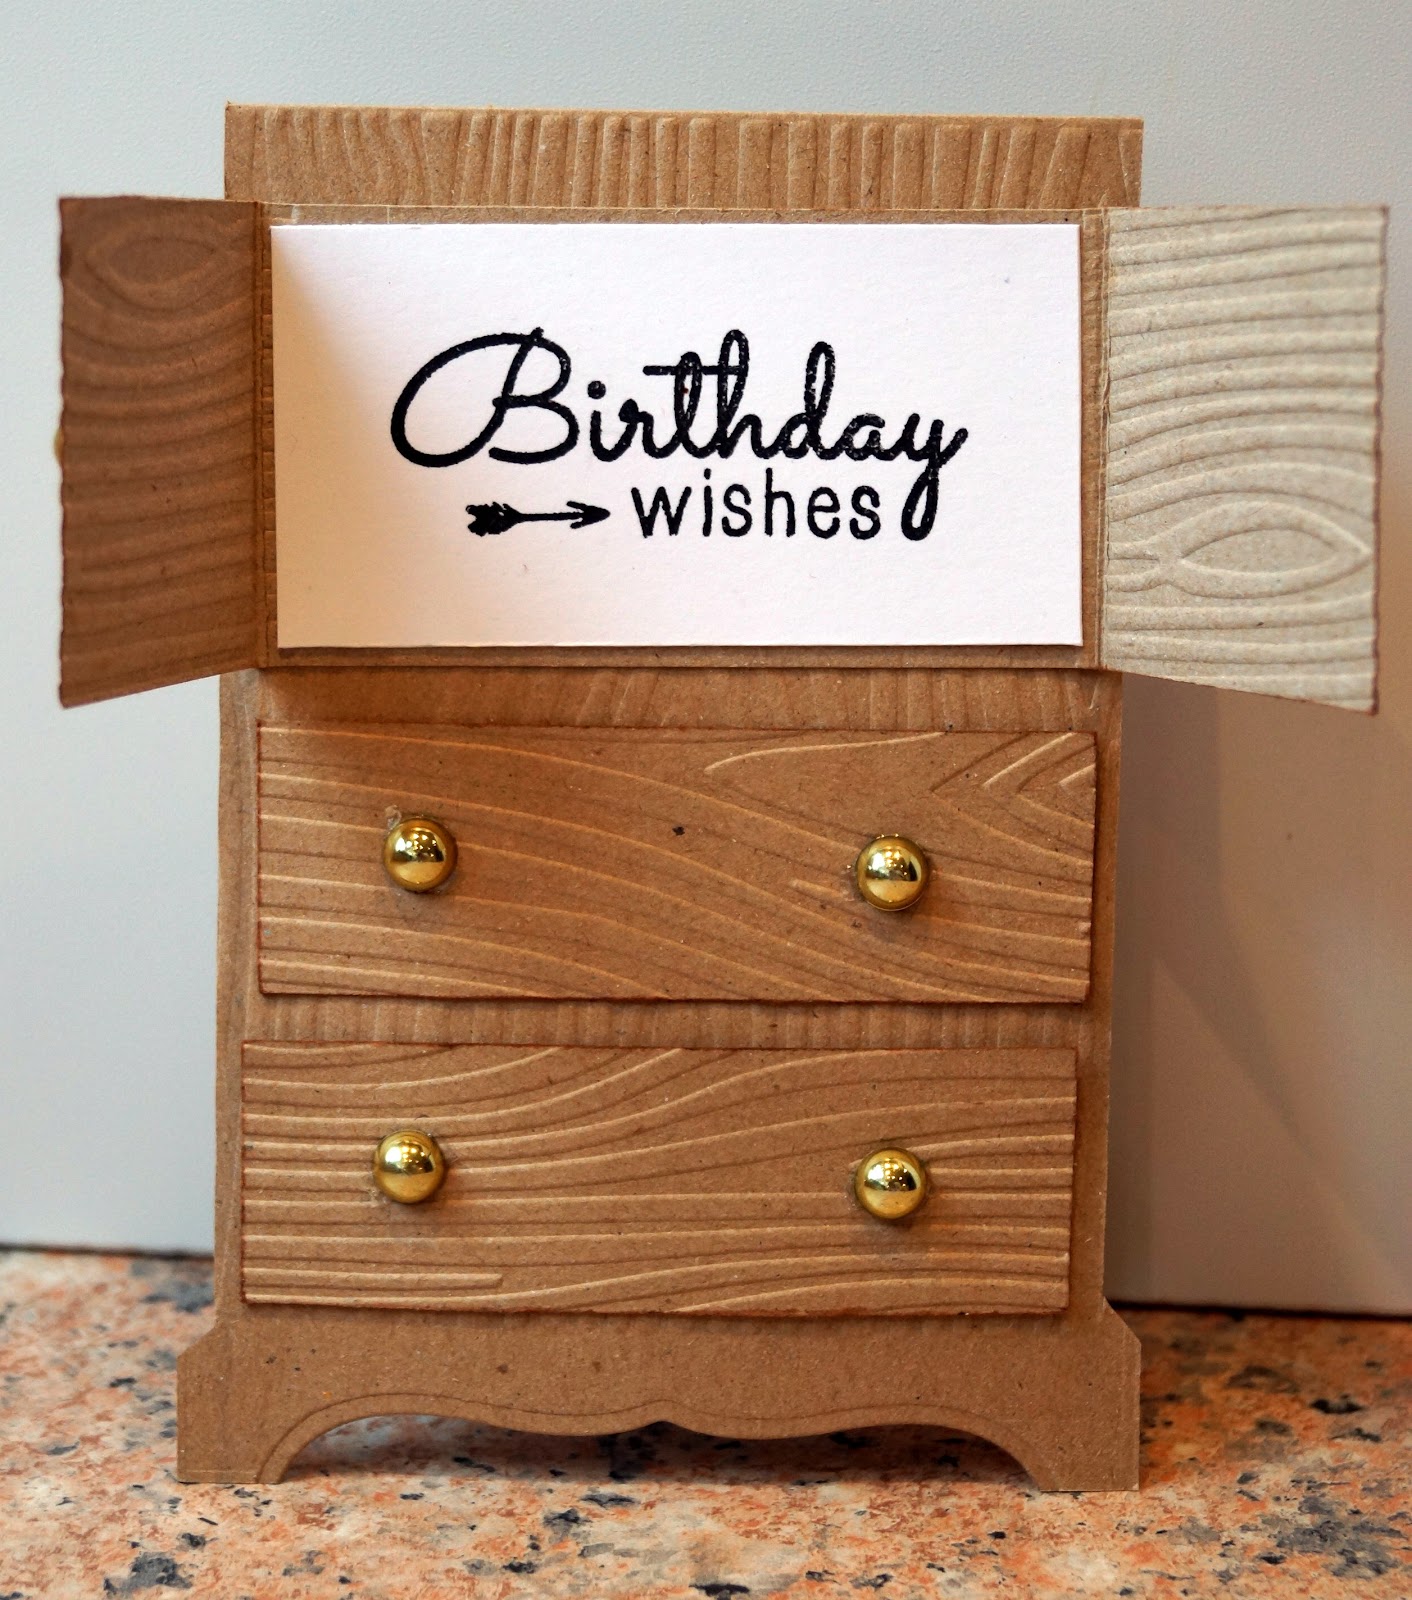
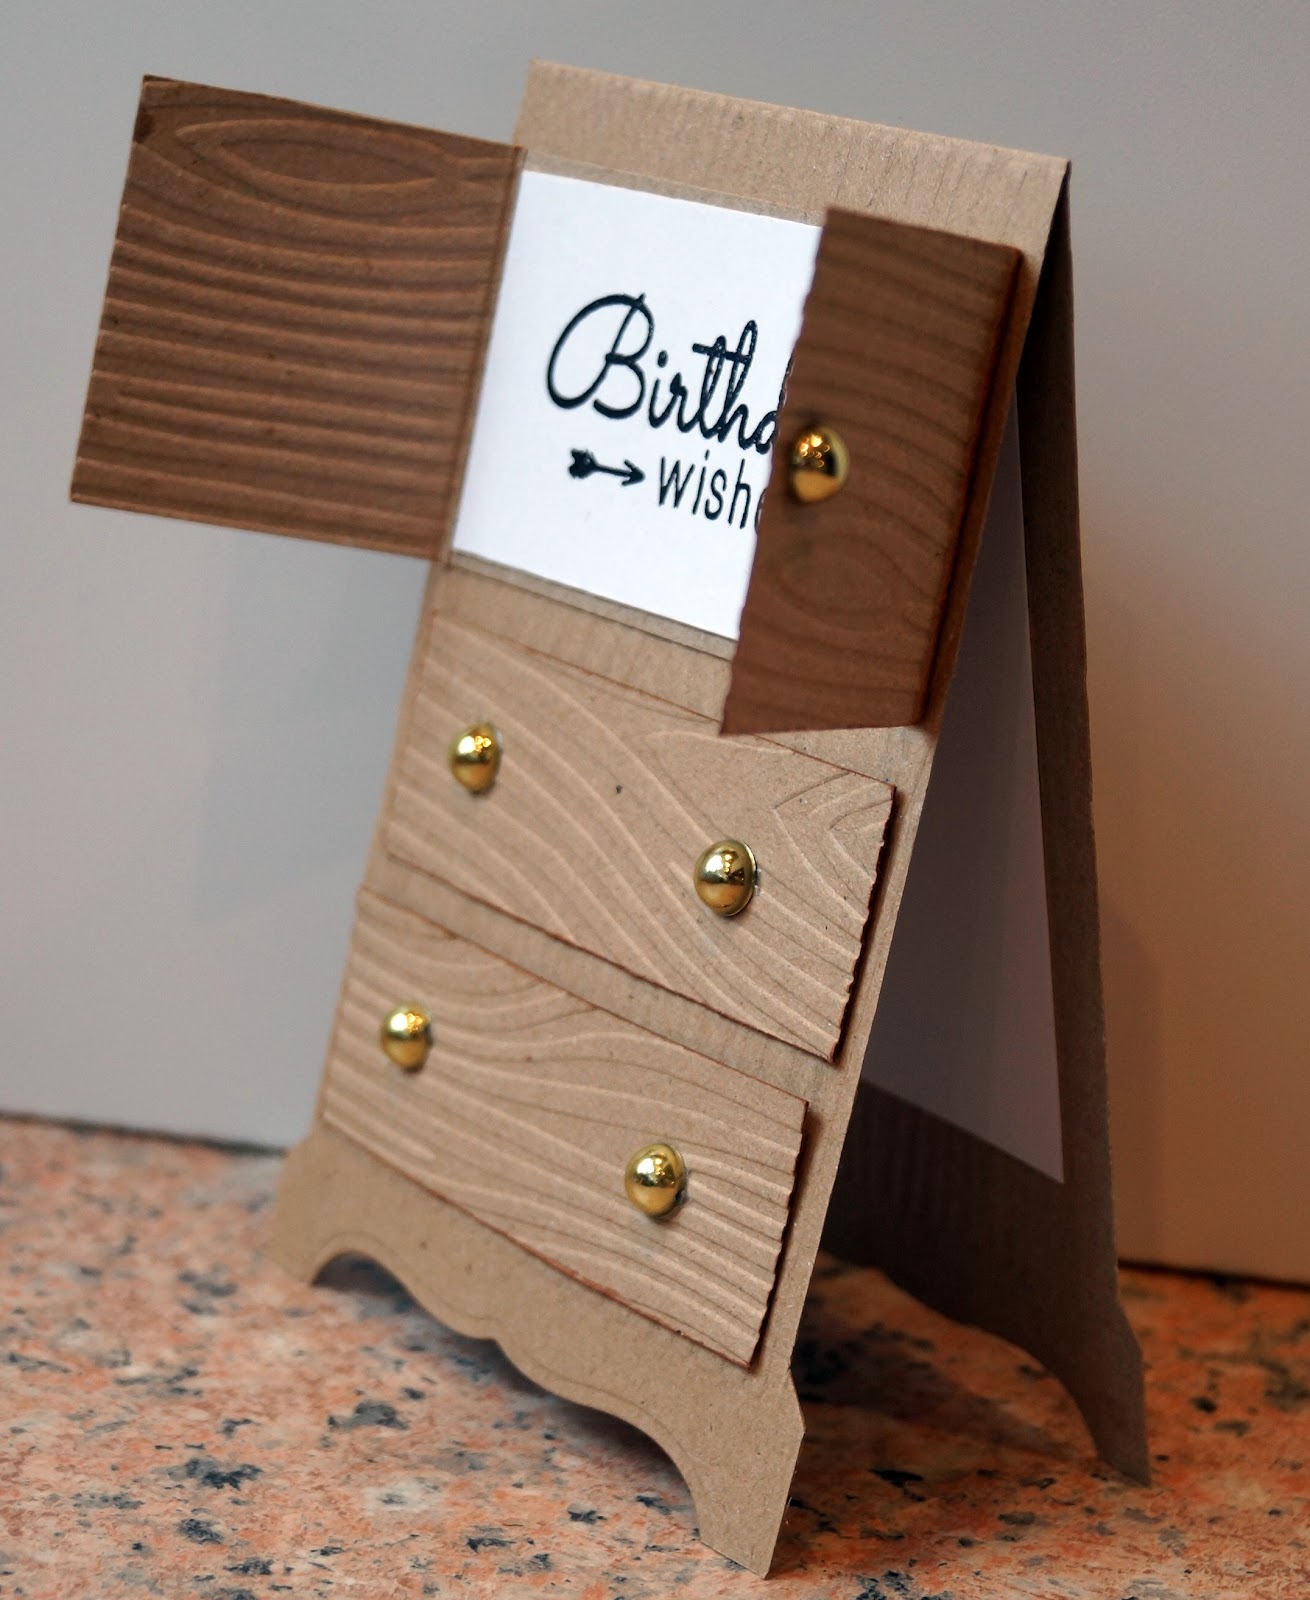
Now on to my makes at the show. The Make and Take involved rubbing two shades of Alchemy Wax - a product I'd never used before - through a stencil, and finishing the card with a butterfly die-cut covered with a sparkle paint.


Uh-oh, I see one of the pearls has moved - I'd better go and fix that!

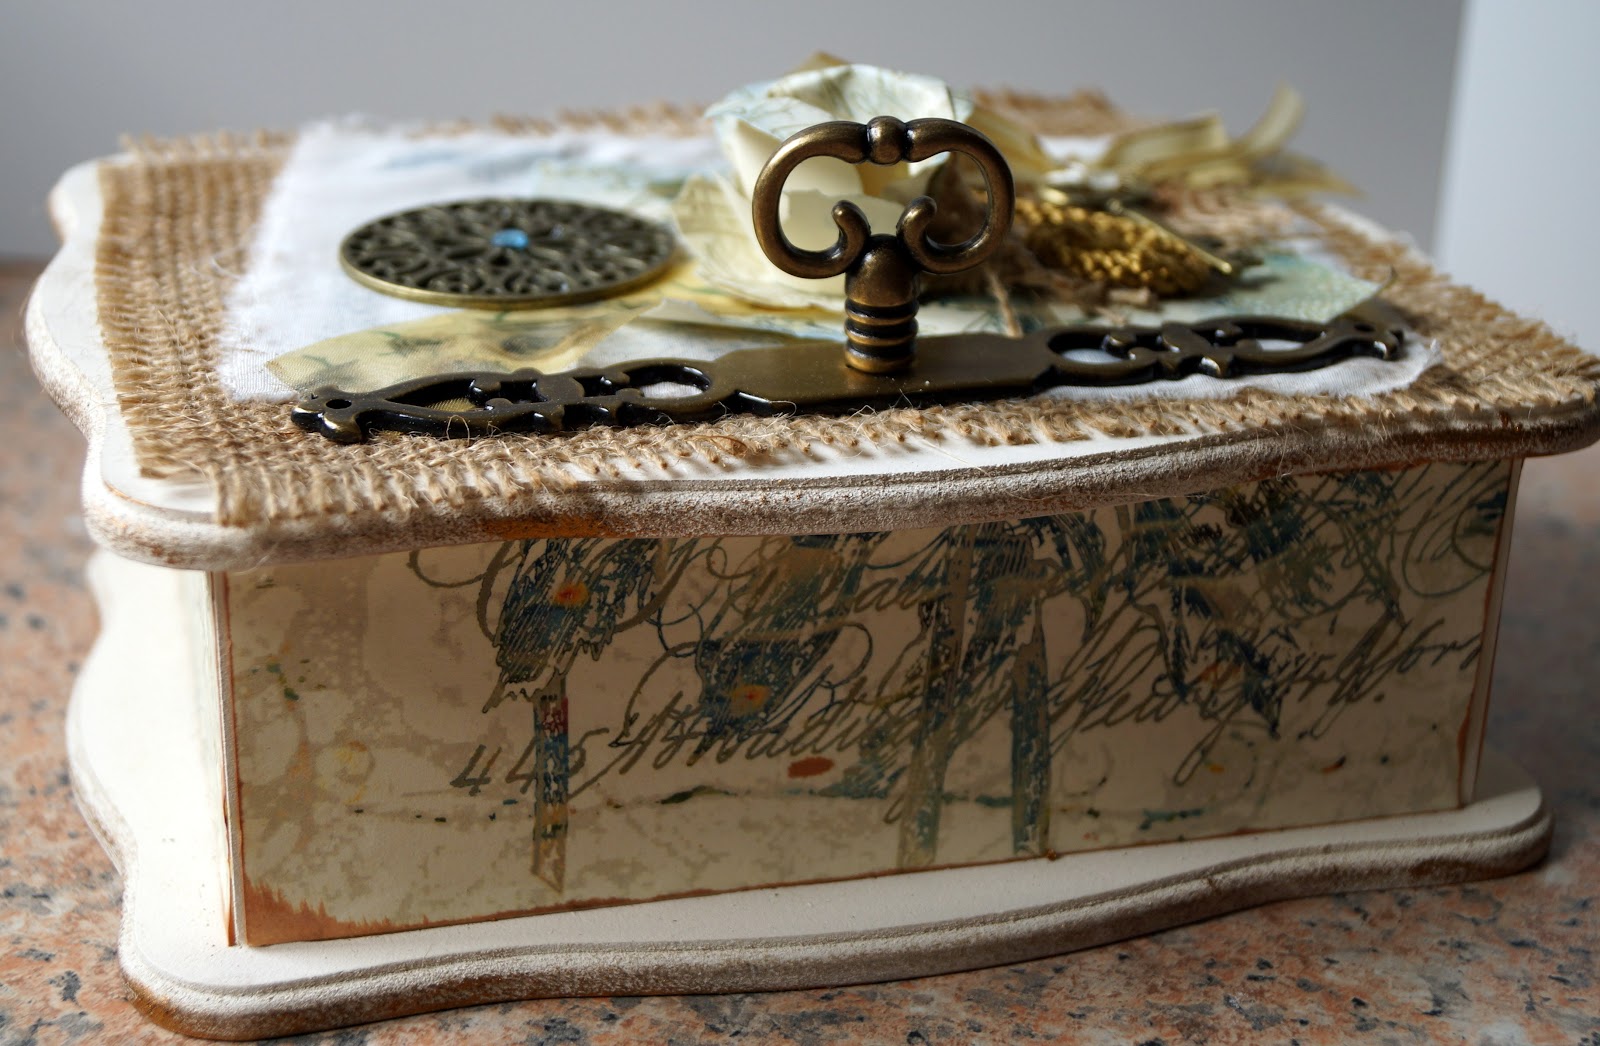
The highlight of my day was the box covering workshop. I don't usually do much in the way of mixed media, so I learned a lot, got myself gloriously messy, stuck, stamped, inked, tore and twisted to my heart's content and finished up with an item I feel VERY proud of. I was fascinated to see that although we all started with the same pack of materials, every box came out looking totally different.

I was a bit alarmed that we weren't provided with rulers, knives or paper trimmers (Elf and Safety, you know) and had to do all the cutting, measuring and getting lines straight by eye, the mathematician in me was having a nervous breakdown about the lack of measuring and trimming, but I left her in the corner sobbing and got on with things without  her for once.
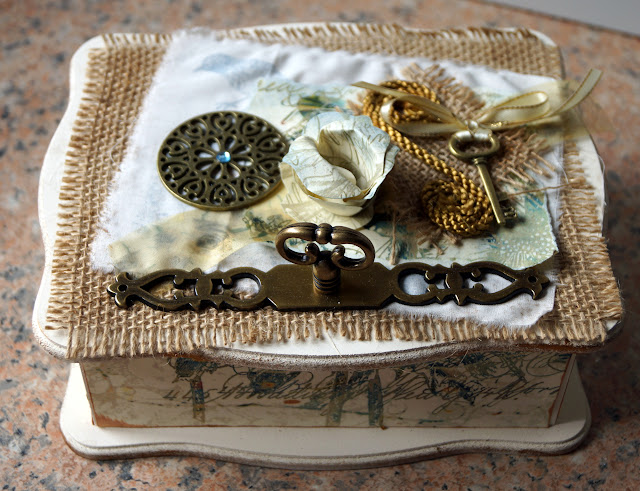
the finished box

Papers for the sides and base, distressed at the edges

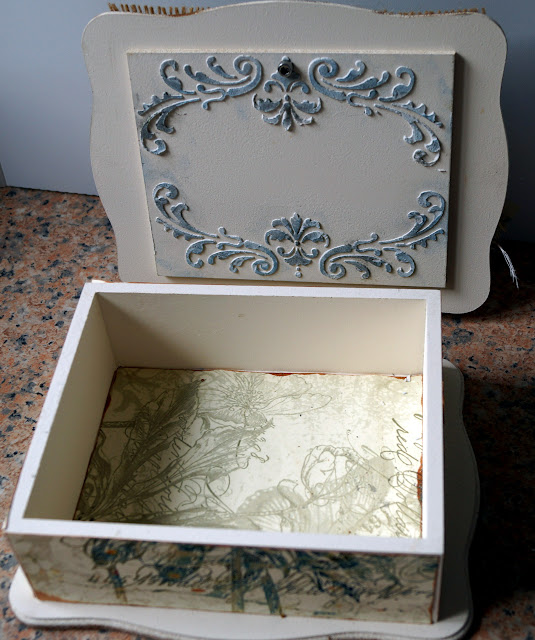
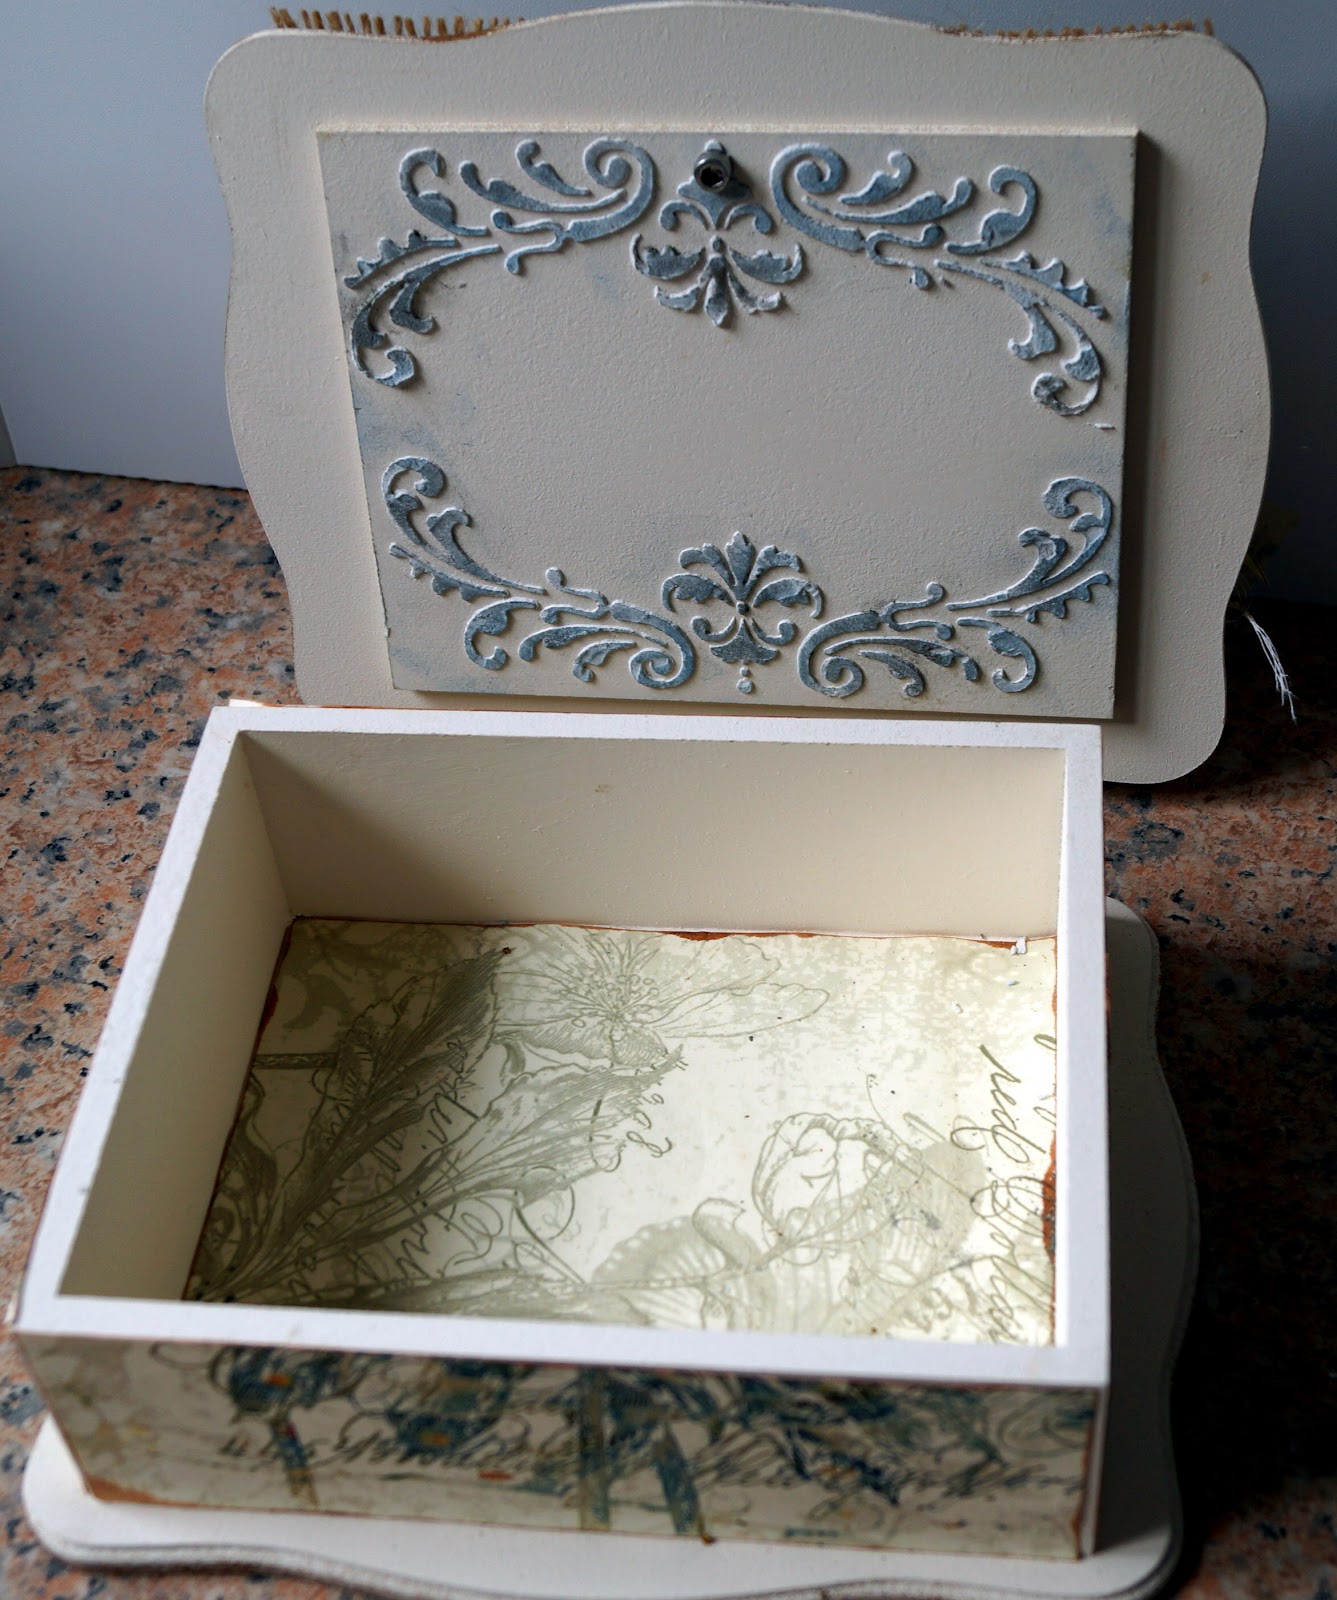
inside the lid was decorated with stencils, grunge paste, distress inks and mica powders

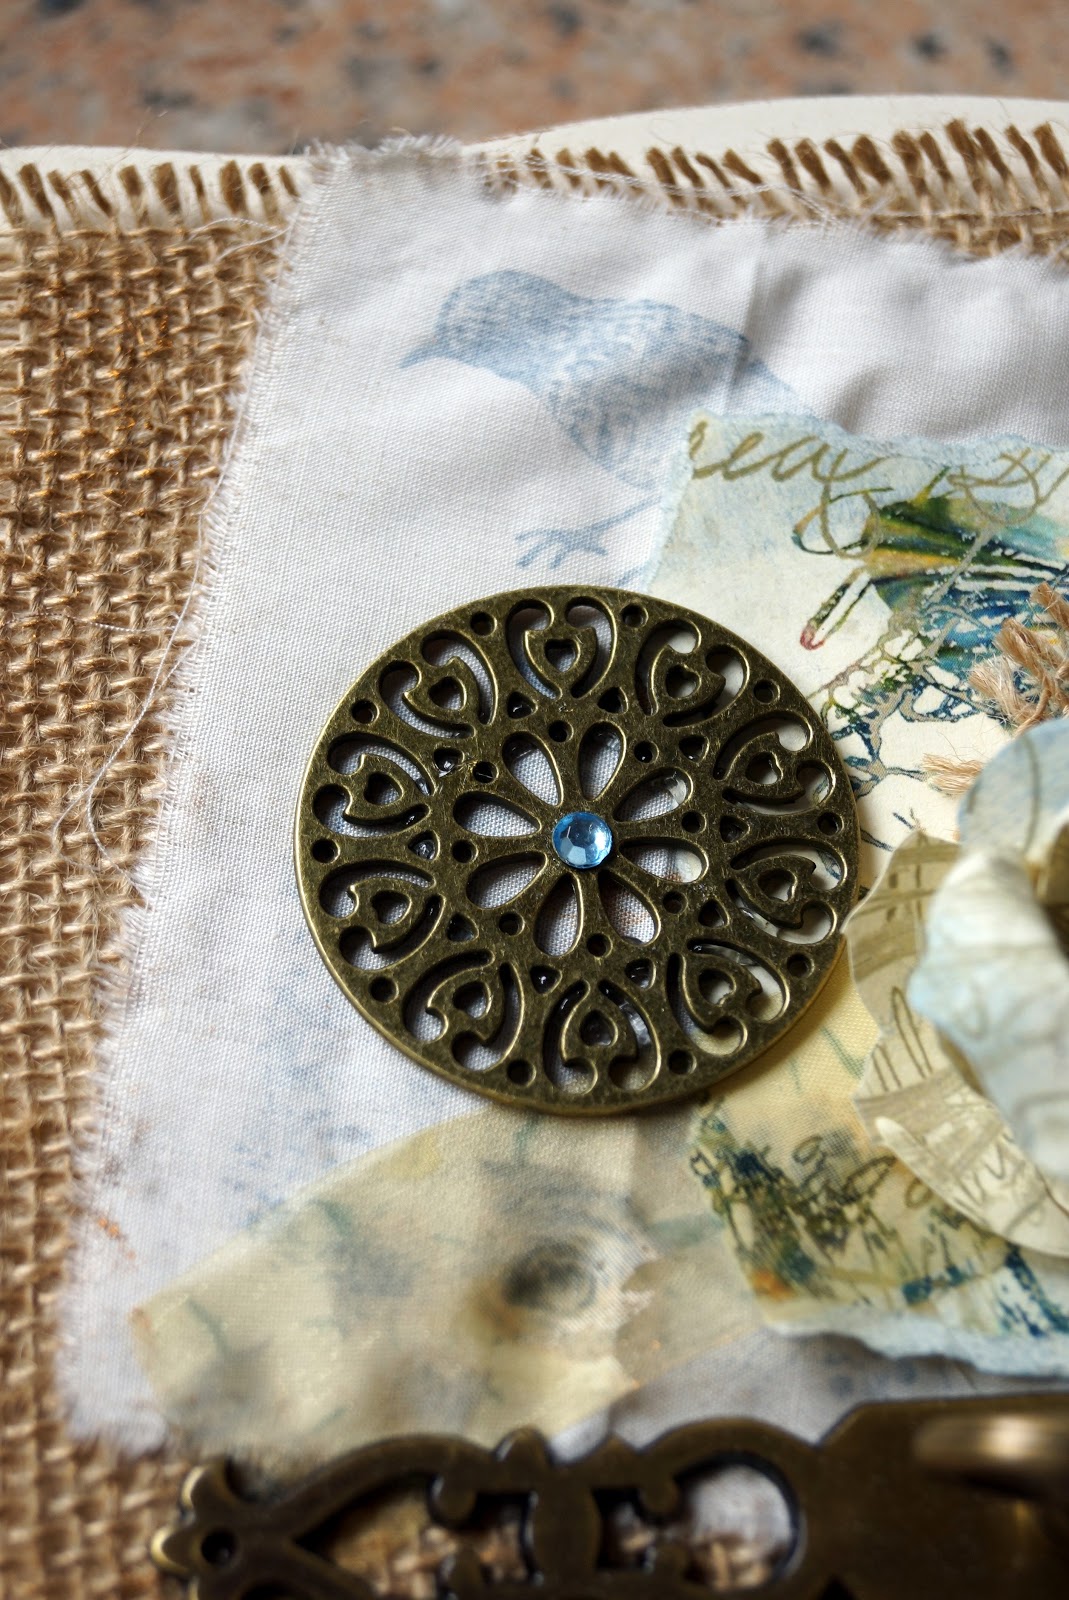
frayed hessian topped with fabric stamped with distress inks formed the base layers of the lid

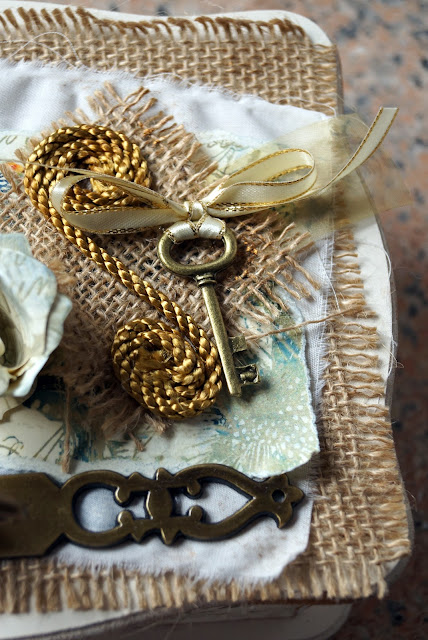
cord coiled into a swirl and a ribbon-tied key to finish.
 There's not an ounce of snark in this, but I can't resist sharing it with the Sisterhood of Snarky Stampers, where the challenge is M is for Mixed Media, because I'm just so blooming chuffed with it. I went about as far as I could get out of my comfort zone - and I survived!

Thursday 25 February 2016

Hooray! Hooray! It's Rudolph Day!

It's the 25th of the month, and that means it's the day we're all invited to make a Christmas card and link it up to the Rudolph Day challenge at Scrappymo's. There's a prize to help with your festive crafting to be won every month, and this month it's a dainty holly leaf border die. But you'll need to hurry - each month's challenge only lasts until the end of the month, and even though it's a leap year, February is still the shortest month of the year!

Here is my card, which I am also linking up to the Christmas challenge at Fab'n'Funky

I've used a negative die cut snowflake backed with turquoise patterned paper, twine, lots of gems and a tag made by punching a circle, stamping a sentiment on it and then using my Crop-a-dile to add an eyelet at the top. It *should* leave me with a die cut snowflake to use on another card, except that particular set of snowflake dies are all real wossnames to get the die cut out of, and as usual it has ended up in shreds. I've tried everything I can think of - wiping the die with an anti static tumbledrier sheet, using waxed paper, running the die and die cut through an embossing sandwich, and nothing seems to work.

Wednesday 24 February 2016

Where are the onions, then?

I've just realised how long it is since I posted anything about food - February's almost over and I've not joined in any foodie challenges or posted any recipes this month.

There IS a reason for it, and no, I'm not sick or off my food at all. It's just that part of my New Year's resolution to declutter the home is to declutter my mountains of books and old magazines. This has meant sorting through lots of them in a sort of snog-marry-avoid marathon - cook one more thing and then  decide whether to ditch it? Take it straight to the charity shop? Award it a permanent place on my bookshelf? So most of what I've been cooking has been from other people's recipes, rather than things I've created myself.

It's led to me rediscovering some great Old Favourites - currently I'm cheerfully revisiting dishes from Delia's Frugal Food  - and also to finding books I scarcely knew I had. In fact I picked up one book called "Lemongrass and Ginger" by Leemet Tan that I can only assume was a competition prize a couple of years ago, when I was feeling too ill to think about food so set aside to read at a later date, because I'm sure I had never opened it - and it is WONDERFUL. Thanks to that book and a recent trip to Hoo Hing's supermarket in Morden, we've had some of our tastiest ever Asian dishes recently.

Anyway, just to prove that I HAVE been cooking and eating, here are a few shots of things we've eaten since I last did any food posts, and a promise to Cheryl, Helen, Camilla, Dom, Caroline, Janice, Elizabeth, Karen and many more that I WILL be supporting your challenges again as soon as my declutter is complete!

Malaysian Tofu with Butternut sauce (Lemongrass & Ginger)

Kangaroo Meatballs on ciabatta with pickled red cabbage and chopped salad (Save with Jamie)  

Beef, beansprout and straw mushroom stir fry

Crispy pancakes with creamy chicken filling (BBC Good Food Feb 2016)

Tuesday 23 February 2016

Birds of Feather at Cardz 4 Guyz

It's time for a new challenge at Cardz 4 Guyz, and this week Jan has chosen

Birds of a Feather

I've chosen to use an image and papers from the Joanna Sheen CD, The Country  Diary of an Edwardian Lady. I'm sure this kind of overlapping double card has a name, but I don't know what it is!


I made the base card by trimming 1cm off the long edge of a sheet of cream A4, then scoring one third of the way along and folding it over to create a 20cm square (approximately) card blank with a half-front. The front and back panels were covered with papers from the CD, layered with a toning blue CS.

Then I made a landscape format A6 card and added the topper, layered with blue, to the front of it, bearing in mind that the fold needed to be on the RIGHT so effectively I was making the card back to front. I used more of the paper for one panel of the inside, and for the other, in order to leave somewhere to write, I cut a piece from the insert sheet printed from the CD.

I mounted this mini-card onto more of the blue CS then stuck it centrally to the back panel of the card, so that the flaps overlapped.

As there were two identical toppers on the sheet, I cut the central area from the second and added it over the first with foam pads. I did consider decoupaging just the bird image, but those swallows' wing tips and tail feathers looked like too much of a challenge!

I was pleased to find I had some really well matching Candi for a finishing touch.


Monday 22 February 2016

Arguing black's white

When I was a little girl, my gran used to say, of anyone who disagreed with her, "They'd argue black's white" so this card is dedicated to the memory of her, because I've made a CAS card with black used for the "white" space. It's not exactly as I'd planned it though - I'd really wanted the sentiment to be pink, but neither my pink inkpad not pink embossing powder was man enough for the job, they both had a degree of transparency which made the sentiment look grey rather than pink, so I ended up making it white instead. So I used white opaque gems for the flower centres to link in with the white stamping.

The embossing folder was, I think, a magazine freebie and the flowers and leaves are die cut from snippets.

 
I am sharing this card with
 
Ooh La la Creations - Clean and Simple
Allsorts Challenge - Birthday Wishes 
Less is More - add some texture 
Pixie's Snippets Playground - Week 217 

The Christmas Meerkat.

This card is made using a stamp from a sheet that came with a craft magazine's Christmas issue a few years ago, and I had to make it because meerkat. I mean,. aren't they the sweetest, cutest of animals? Some of the best TV documentaries ever show them in the wild, and even in zoos they seem to thrive on the visits from the public, reacting as if your visit to the enclosure is a treat for THEM, not for you.

They aren't really creatures that I'd associate with snow and with Christmas though, so I'd never used this stamp. Not until I spotted this speech bubble stamp, off a Studio G mini set, and thought  how well it would work with the cheeky little meerkat, getting ready to throw his snowball at Santa.

I stamped him with Memento ink and coloured him with Promarkers, matching his (or her, I'm not sure how to go about sexing a meerkat) scarf to match the backing papers which also came with the magazine, then added Stickles glitter to the snow and used a grey glitter card for matting. It's supposed to be encapsulated glitter, to make it easier to stick, but I still had to sand it and use the extra-strong DST combined with Pinflair glue to hold the layers in place!

I'm sure my UK based friends will be very impressed that I've managed to write an entire meerkat-based post without mentioning insurance comparison sites. In fact it was.......SIMPLES!


I'm sharing this with

Alphabet Challenge - Z  is for Zoo Animals
Crafty Hazelnut's Christmas Challenge - Cute
Christmas Card Challenges - Anything Goes
Sweet Stampin' Challenge - Glitter and Sparkle
Fantastic Tuesday - Make it Cute
Glitter and Sparkle - Anything Goes  

A CAS Christmas

Here is a very CAS Christmas card which I have made using a small text stamp which I think is a Studio G one (I do wish manufacturers would print their names on the acetate backing sheet!). I stamped it once in red then overstamped, slightly offset, in black. Then I masked the stamped area and sponged lightly around it in red and finished it with a scattering of sequins.

Very quick, very CAS and if you move your head from side to side while looking at it, it reminds you of the feeling after a Christmas morning glass of champagne!


I am sharing this with

Winter Wonderland - Clean and Simple
Double D challenges - Red & White
Jingle Belles - TEXT me!
AAA Cards - Sequins   

Sunday 21 February 2016

Thank You at CD Sundays

Today is my final challenge as a Guest Design Team member at CD Sundays - thank you very much, everyone, I've really enjoyed my time with you. Although I have to own up to having missed the sense of anticipation every alternate Sunday morning, wondering what the new challenge was going to be!

This fortnight's challenge is Thank You and I decided to use my lovely Memory Box Thank You die, choosing a selection of papers from the Polkadoodles Cherryblossom Lane CD to go with it. Instead of white or pastel colours for the die cutting and matting, I went for black to really contrast with the lilac patterned papers, and made a large 20cm square card. I think all that black might have looked too heavy on a smaller card. The die cut corners are cut with a very old Cuttlebug die.

Saturday 20 February 2016

Anything Goes at Twofers

Today it is my turn to choose the theme for the new challenge at Twofers, and I have chosen a nice, easy one - ANYTHING GOES.  Why not pop over and share your makes with us? It can be absolutely anything at all, as long as it includes some stamping and no digis. And as always, there is a $20 Alleystamps voucher for our favourite. Don't forget, you only need to make ONE item for our challenge, although of course you are free to make more if you wish to.

Now my lovely teamies Christi and Zoe thought I was making it too easy on myself by picking Anything Goes, so they gave me an extra challenge, all of my own. They tasked me to use my very oldest stamp, which in my case is this PSX Celtic Knotwork stamp, one I've used many, many times over the years but had been lying idle for a long time.

To go with it, I chose some very old stash too. In fact, I thought I'd completely lost this paper - I bought it when we were on holiday in Bangkok, way back in about 1998, and lost it as soon as I got home. Eventually I thought I must have thrown it away with the packaging from the souvenirs, a great pity as it was one of two huge, giftwrap-sized sheets, of hand made paper. So I was delighted when my recent craft room declutter produced it, tucked down behind a rarely-moved cabinet.

The paper is so beautiful that the stamped image needed no more embellishment, anything more would have detracted from the lovely paper. So if you discount the 18 years spent trying to find the paper, this was an extremely quick card to make!


If you'd like to use YOUR oldest stamp, too, it would be great fun to see what you unearth, but there is no need to do that (it's just me being nosey and wanting to see what's lurking in your stash).

I would like to share this with:
Crafty Hazelnut's Patterned Paper challenge - February 
Sparkles Monthly Challenge - Something for the Males
Craft Your Passion Challenge - Anything Goes
A Bit More Time To Craft - Anything Goes

Friday 19 February 2016

Victorian Gentleman

What a busy few days I seem to have had - there's not been much time for crafting or blogging, but I've finally got something to show you apart from the heap of gone-wrong experiments on my craft table, about which h the less said the better. Let's just say there's a good reason I don't do much cute girly stuff and leave it at that....

As a reaction to the cute girly failures, I hoiked out a selection of rather steampunky stamps and slid gratefully back into my comfort zone with a very masculine card. I edged all the cream panels with Tea Dye DI and did all the stamping with a Vintage Sepia Versafine pad. To get the paler look for the background cogs, I stamped each one onto scrap paper first and just used the ink that was left behind. All the matting is dome with a matching brown, although it's come out looking much darler on the photo.

Originally I added the panel with the gentleman at a jaunty angle, as I'd planned from the outset, but it looked Just All Wring so I peeled him off and straightened him up.


I'm sharing this with:

Fab n Funky - Male Birthday
Sparkles Monthly Challenge - Something for the males
The Male Room - Monochromatic  

Wednesday 17 February 2016

A butterfly explosion card

Back in the day, explosion cards, where a piece of paper bigger than the actual card opens out when you open the card, were A Thing and I've noticed them popping up (groan...... see what I did there?) again here and there, so I thought it was about time I revisited the technique.

The idea is quite simple, once you've worked out what size of paper to use. There is a  simple fold called the Turkish Map Fold (lots of articles and videos about it can be found by googling) that makes the paper sit neatly folded in the card until it is opened and then...... POP!!! The whole thing springs open.

I used a 20cm square of paper to sit inside a 10cm square card, which worked very neatly. I wanted to make sure I got the orientation of the stamping right, so I did a test fold with scrap paper and made notes on it to show where I wanted everything to go.

Then I did the stamping on a still-unfolded square of paper, using a gorgeous set of Indigo Blu stamps that was a magazine freebie last year. I set it aside for a few minutes to make  sure the ink was completely dry before starting to fold (actually that's a bit of a porkie-pie, I set my second attempt aside to dry, on account of what happened when I folded the first too soon). If I'd remembered to use a faster drying ink, it wouldn't have been necessary.....

For the outside of the card, I used more stamps from the set to make the panel, then unearthed an ancient scrap of shrink plastic and stamped the large butterfly twice with Stazon, cut it out and shrank it to make the embellishments. 


I am sharing this with

Crafty Gals Corner - Fancy Folds
Use Your Stuff - Black and white
Addicted to Stamps - Anything Goes
Butterfly Challenge - S is for Stamping (sorry, no sapphire this time!)
Shopping Our Stash - Fantastic Plastic
Mod Squad - The Great Outdoors
Inkspirational - Pop 

Tuesday 16 February 2016

Going to the Zoo at Cardz 4 Guyz

This week it's my turn to choose the theme at Cardz 4 Guyz, and I have chosen Going to the Zoo

Now I don't know how you feel about zoos - personally I have very mixed feelings. I hate to see wild animals kept in enclosures and out of their natural environment. But on the other hand I don't think it's possible to really, REALLY appreciate them by looking at pictures or watching films, the only way to really understand how important they are is to see and hear - and yes, even smell - them in real life. So since we can't all afford to visit these wonderful creatures in their natural habitat, and as long as everything possible is done to ensure their welfare, and the zoos take part in important conservation work, I think they have a place.

Well, that's the controversial bit over! But it does explain my card a bit - I have used all the cute animal images from the Woodware Jungle Pals set, but I've set them against a grey background embossed with a Crafters companion stone wall folder, to represent the enclosures they are being kept in. The wall gives the card a rather more masculine look, too, don't you think?

I must say, though, these particular animals are looking very happy about it!


We'd love to see YOUR take on the theme!

I'm joining in with

Fantastic Tuesday - Cute 
Craft Your Passion - Anything Goes
A Bit More Time To Craft - Anything Goes

Sunday 14 February 2016

Dandelion clocks

Nowadays, I don't panic half as much as I used to when it comes round to a one layer week at Less Is More, nor, it seems, do lots of other crafters because it's only day two if this week's challenge and already the gallery is bulging with wonderful artwork.

The theme for the one layer card this week is to use a stem, so I've chosen to use this dandelion clock stamp from Blade Rubber. I masked off a rectangle of the card and stamped it three times using Versamark ink, then rubbed light green chalks over the images, then overstamped in black so that the green images formed shadows.


I am sharing this with

Less is More - One layer - use a stalk
Fantasy Stampers - one layer
Sweet Stampin - Clean and Simple

You asked for it.....

So the other day I posted my cute Kitty Love card, and certain readers suggested they would have liked to have seen the card I DIDN'T make, with my "drunken cat" stamps.

Which of course meant I had to go ahead and make it. Oddly enough I couldn't find a stamp with the right words on it, so I used Serif Craft Artist to computer generate the text and position it at rather drunken angles.

The cats are coloured in with a mixture of pencils and pastels, with the champagne glasses highlighted with a little gold glitter. The stamp set was a magazine freebie a few years ago and I've used odds and ends from my snippets box for the layering.


I'm popping back to Show Us Your Pussies for a second entry into the Kitty Love challenge and heading over to the Snippets Playground to share this with our guest head prefect for the week, Dick Orem. I don't know, what with Pussies and Dicks, anybody would think it was Valentine's Day or something!

Saturday 13 February 2016

Blue butterflies and lace

Another make from me today, this time a very quick and CAS card.

I took snippets of dark and light blue and used a Cuttlebug die (I think it was the one that came with my first machine) to cut two squares of each colour. With the scraps left over  I punched two tiny butterflies in each colour.

Then using a Kanban lace background stamp, I stamped lace in white on the dark blue squares and in blue on the light blue ones. Attached everything to a square card and finished with a ready made sentiment from Craftwork Cards.

I think the squares look as if they are lacy fabric cut with pinking shears!


I am sharing this with
Butterfly Challenge - S is for Stamping or Sapphire  and it had to be a birthday card to celebrate the challenge's 2nd birthday!
Sweet Stampin - CAS
Suzy Bee's Blooming Challenge = Anything Goes/Sentimental   

Going around in circles

Today's card is an easel card made using one of my oldest dies: I think it is a Marianne Creatables one and I love using it to make circular easel cards with.

To make the base card, I positioned it onto folded white card so that two scallops slightly overlapped the fold, taking care to position it so that when I folded one layer over, the scallops would match up, then cut my card and scored and folded right across the top layer.

Then I cut the circle again and this time also embossed it, using coral coloured card.

I printed the image off from the Rachelle Anne Millar Collection CD, and cut it out using the largest Spellbinders circle die from my Nestabilities set, cutting a circle in blue as well for the base.

The embellishments are a couple of acrylic heart charms and a selection of "singleton" buttons, and the sentiment is a die cut Craftwork Cards one.


I am sharing this with

Cuttlebugmania - Kids 
Allsorts Cahllenge blog - No squares - circular cards

Thursday 11 February 2016

Kitty Love

As you know, I'm not keen on making cute or pretty things for Valentine's Day. But I really wanted to show the ladies at Show Us Your Pussies that I'd not forgotten about them. The current challenge is Kitty Love and nothing among my stamps or CDs is remotely suitable (Well, I do have a stamp of two rather drunk looking cats leaning on each other - I can imagine the conversation... "I bl**dy love you Tiddles" "And I bl**dy love you, your my beshtesht ever friend.... er.. .wossyername") so it was back to the Little Meow kit that I won a few months ago. I'd been hoping to use the kit with my 6 year old granddaughter, but she took one look and said "Can I use your stamps instead, Grandma?" so I'm left wading through the box. Very sweet, but after I do a few I start to feel a bit nauseous.

Stop rambling woman and get on with it!

So here is my card, using decoupage, paper, gems and a sentiment from the kit along with a couple of  die cut hearts.

Wednesday 10 February 2016

Chest of drawers card - tutorial

Actually, this isn't so much a chest of drawers as a copy of a piece of furniture my Mum has in her bedroom - she calls it a linen press but I don't know whether that's the official name. It has a cupboard on top and two drawers down below, which I have replicated here.

 
and for anybody visiting from Make My Monday and wondering where the arrow is, inside the door is a sentiment, complete with arrow!

 
I've added a piece of white card to the inside to write the greeting on.


This was actually very easy to make. I started with an A4 sheet of Kraft which I folded and cut to make two A6 sized tent cards and set one aside for another time. Then I cut the folded card at each side, 5 mm from the edge, from the fold down to 2 cm from the bottom edge, and then at a 45 degree angle out to the edge. Then choose a label die that fits most of the way across the bottom of the card, hold it on place with low-tack tape (or bits cut off a sticky note!) and die cut through both layers of the bottom to create the "legs". You could just do this by cutting straight lines but I like the effect a label die creates, and you can ring the changes by using different ones.

Now put the folded card through a woodgrain embossing folder, positioning the folder so that the grain runs vertically and the bottom 2 cm remains unembossed. Because kraft card can be quite thick and it is double thickness, I use a thinner plate in the sandwich than my usual embossing one. I've already killed one Grand Calibur, I can't afford to make a habit of it!

To make the drawers, cut two pieces of kraft  9 cm x 3 cm each, and emboss them with the grain running horizontally. For the cupboard, cut a piece 18 cm x 5 cm and score at 4.5 cm from each end, to form the doors, then emboss each end panel separately, again with the grain running horizontally.

Lightly ink the edges of the drawer and cupboard pieces and attach to the card. Cut a piece of white card 4.5 cm x 8.5 cm, stamp your chosen sentiment on it and stick it inside the cupboard. Also cut a piece of white card to fit inside the card to write on when sending it - the embossed surface would be too difficult to write on!

Add gems or pearls for knobs - I used brass effect ones from my stash.

If you are making the card for a specific occasion, you could fill the cupboard with stamped or decoupaged images suitable for the occasion, and arrange bits peeping out of the drawers too, but I've kept this as a generic birthday card.

Right, I'm going to share this with a few challenges:

Make My Monday - Arrows
Use Your Stuff - Use an embossing folder
House of Cards - Shaped cards 
Shopping Our Stash - bent out of shape