Tuesday 30 June 2015

Something beginning with B at Cardz 4 Guyz

This week at Cardz 4 Guyz we'd like to see something beginning with the letter B on your card.

I've stamped a background using a set of stamps that was free on the final issue of Get Stamping magazine last year - such a useful set, I've used it many times. The fence and grass had to be stamped several times to cover the width of the card, and I stamped the grass twice, once in a lighter green and once in a darker, moving the stamp half-way to the left for the darker grass so it didn't line up unnaturally.

The bicycle is a Diesire die and the button from a super bargain bag I picked up on Amazon.

So here we have B for Bicycle, Bird, Branch and Button.


I am sharing this with
Crafty Gals Corner - Anything Goes
Use Your Stuff - Anything Goes
Clear It Out Challenge - Your style (stamping) and Your Favourite Craft Product (stamps, especially the set I used for the background)
Shopping Our Stash - Baubles, Buttons and Bows

Monday 29 June 2015

Inspired by an English Country Garden #7

On our recent trip to West Green House, one particularly striking display was a row of alliums (or should that be allia?) that were really over, but rather than being cut down, had been left to turn brown so their spiky brown spheres contrasted strikingly against the lush green lawns beyond them.

I wanted to try to recreate this with a diecut, but didn't have an allium die - so I've used the Memory Box Chloe die to give a similar effect, adding a sprig of foliage cut with a Spellbinders Sprigs die. The diecuts are a pearlescent dark brown in real life, but I think the reflection from the pearlescence has made them look almost black in the photo. The background is made by covering an acrylic block with green ink and spraying it with water.


I'm sharing this with
Suzy Bee's Blooming Challenge - use two colours
Pixie's Snippets Playground (as the brown card was from my snippets box) - week 183
Less is More - sketch challenge


Ship ahoy!

I seem to have created quite a few nautical themed cards recently, which is probably why I keep finding myself humming songs from "HMS Pinafore" (I've always nursed a secret urge to play the part of Little Buttercup). Today's card was made for the "Blue as the Ocean" challenge at Allsorts Challenge Blog.

All the stamps are from a Kanban set that came as part of a QVC kit, and in fact the die cut circles are from the same kit..... I know I'm perfectly capable of cutting my own, but I'm really trying hard to use up some of my older stash!

I used Broken China distress ink to stamp the main image, then with a water brush drew out some of the colour in the sea and sky areas to blend them slightly. Then I picked up a little more of the ink from the pad with the water brush and strengthened the colour on the ship and the bands of the lighthouse.

The backing paper is from Graphic 45, stamped with the compass design from the stamp set, and the anchor from the stamp set was stamped and embossed in silver.


Sunday 28 June 2015

Inspired by an English Country Garden #6

I thought I'd finished this series of makes - and then at the weekend, Mark and I visited West Green House, near Hartley Wintney in Hampshire. The house isn't open to the public, but the gardens are, and National Trust members can go in without charge. As it's only a few miles from home, it's a very easy outing for us, and one we don't have to plan ahead for, instead taking advantage of any fine days when we're both at home.

Mark, of course, is in his element taking photographs whenever we visit a garden. And the gardens of West Green are a photographer's paradise - so many different styles, so many interesting features, and of course so many beautiful flowers, all crammed into a relatively small area.

Mark has written about the gardens in general here and about the flowers here. If you look at the first photo on the first of the two posts, you'll know immediately what inspired me to create this card:


The brickwork paper was printed out from the CD "The Best of La Pashe 2012" and the garden scene from Debbie Moore's "Shabby Chic Enchanted Garden" CD. I covered the front of an A5 card with the brickwork paper then die cut a circle in it. I sanded all the edges and then inked them lightly with Ancient Mahogany distress ink. I added adhesive to the back of the image  and lined it up behind the aperture to make sure exactly the part I wanted showed through, then closed the back of the card over it to stick it in place.

The front was simply decorated with trimmings from the Debbie Moore design sheet and leafy sprigs cut with Spellbinders "Sprigs". If I'd had a trailing ivy die, I'd have used that instead.

Feelin' hot, hot, hot!

Here in the UK, we are threatened with a serious heatwave later this week, with temperatures up in the mid 30s. Of course we are - it's the start of Wimbledon fortnight and that always brings with it torrential rain or abnormally hot weather. Or indeed both, in the form of a classic British summer, three fine days and a thunderstorm.

Anyway, this little chap looks set to make the most of it! The stamp I used for him is an old one I've had for years - I hardly ever use it as I'm a bit of a wimp about colouring, especially when it comes to skin and hair. I can't remember the brand - I think it's a French name - but the rubber is bright blue rather than the more usual red or grey. The sunshine is the cover stamp from an old issue of Craft Stamper. All the papers are from my snippets box and the "foam" at the edge of the sea is made with liquid pearls.

I really wanted to give him a bucket and spade, but had nothing suitable, so I turned a punched circle into a beach ball and used some embellishments from a RAK to make him indulge in that other great seaside tradition, stuffing one's face with junk food. Chips in one hand, candyfloss in the other, and hopefully a sick bag in the back of Mum's car for on the way home.....


I'm playing along with:

Sweet Stampin' Challenge - Red Hot Summer
Make my Monday - Beach  
Pixie's Snippets Playground - week 183

From my cook book shelf - The Bestway Cookery Book


I'm sure you know how much I love old and interesting cookery books, and this is one that I picked up for a few pounds in an antique shop. Unfortunately it is undated, but the illustrations put it firmly in the first half of the 20th century. The style of labelling on the colour plates suggests maybe the 1930s.


The full title of the book is "Bestway Cookery Gift Book which tells you all the important details other cookery books leave out!" although there doesn't seem to be very much detail included that wouldn't be found in any other recipe book of the time.

Much of the book is devoted to cakes and puddings, with the first chapter entirely devoted to cakes and further ones covering hot puddings and pies, cold desserts, chocolate dishes and jams and preserves. Although every dish is photographed, very little attention has been paid to presentation, with wonky candles on a birthday cake and carelessly piped cream on desserts. The dishes and plates used for presentation seem to be a very limited range and some photos are used to illustrate more than one dish. For instance macaroni cheese, cheese souffle and rice pudding all seem to be exactly the same photo!


Some of the recipe names would raise a few eyebrows these days. I was quite worried about the idea of Jelly Mange..... It sounds like something you might take your pet to the vet to be treated for, but actually it is a packet jelly made up with half water and half milk, presumably a play on the word blancmange. And as for the cooking times for veg.......25 minutes of boiling for asparagus! Surely it would disintegrate to a mush. Or, as Mark suggested, maybe water boiled at a lower temperature in those days. It's inflation, you know, everything's gone up since then.


Something I really love about old recipe books is the fact that previous owners of them have often tucked in clippings from newspapers and magazines. This book contains a lovely selection, including recipes for cold beef and for apricots, as well as suggested menus for entertaining your mother in law for the day. And two real gems: one is one of Elizabeth David's original newspaper columns, all about "baby marrows" or courgettes. These columns were the basis for her earliest recipe books, so now I can quite honestly say I own a first edition Elizabeth David! The other appeals to me not just as a food lover, but as a comper. It is a column from the Daily Telegraph dated Friday May 30th 1947 and gives the results of a competition they had run to find new recipes for salad cream. And the recipes sound lovely, too. In fact I may well give the first prize winner a try.

The first prize, of a patterned coffee set, was won by a Mrs C C Stevens of Chorley Wood, the second of a cream making machine by a Miss M N Spencer of Clifton and the third, of £1 cash, to Mrs J Hamilton of Tiverton. Wouldn't it be wonderful if they, or one of their descendants, were reading this?


And finally - don't you just love the frock? "Does my bum look big in this?"

Friday 26 June 2015

A life on the ocean wave

A very quick CAS make for the Nautical theme at  CASology - using a Kanban topper sheet. I added a stamped anchor, and inked around the white card with blue. Quick, easy and self explanatory!

Thursday 25 June 2015

Those magnificent men in their flying machines

Last weekend we went to the 60th birthday party of a friend. It was a fancy dress party, and our host dressed as Biggles. So when I decided to make a thank you card, I was delighted to find this super set of images in the Kanban Steampunk Themed Card Kit from Foil Play. Now Steampunk is a style that tends to be outside my comfort zone - it's a whole, complex genre that isn't limited to just craft - yet once I started playing with the die cuts, toppers and backgrounds, the inspiration simply kept on coming......


I am sharing these with:
The Male Room - Up in the Air (No birds)
Shopping Our Stash - For the boys

Oh Christmas Tree, Oh Christmas Tree.....

Can I just remind you that today it is exactly six months until Christmas Day?

And being the 25th of the month, it is also Rudolph Day at Scrappymo's, so here is my card for this month's challenge.

The tree is cut using a die that was a cover gift on a magazine a year or two ago, and I have stamped the star-and-snowflake border (part of a docrafts set) and the greeting (a Studio G mini set) with gold ink and embossed with gold holographic powder. On the photos, it looks a little patchy and uninteresting - but in real life, it's quite the opposite! The apparent patchiness is actually  the surface having a sheen of different colours that looks different every time you look at it.

Holographic embossing powders never fail to amaze me - they don't give the raised texture of a conventional powder but the appearance they produce is absolutely magical. However if you've never used them before, a word of warning.... you know how glitter can get everywhere, even if you're really careful? Well, holographic powders are ten times worse. They seem to release microscopic particles into the air, which take several hours to settle. And when they do, there are pretty holographic sparkles on your walls, floor, hair, eyebrows, pets...... be prepared for a LOT of vacuuming! (I haven't vacuumed my eyebrows, you'll be pleased to know, but just about everything else).

OK, I'll stop rambling now and show you the card! I've taken it from two angles to try to show the variation the hologram powder gives, but it's still not like the real thing.


I am also sharing with
 
Fab 'n' Funky - Christmas
Crafting by Designs - Get Ready for Christmas 
 

Wednesday 24 June 2015

Inspired by an English Country Garden #5

I am STILL drawing inspiration from our recent garden visits - coming to the end of the posts I'd planned now, although if the weather is fine we are planning more garden visits this weekend - so watch this space!


Of course there were roses everywhere, beautiful fragrant ones, and although the only photo I took of them was this pink rose arch, I was very taken with the number of yellow roses in all the gardens. I tend to think of the really fragrant ones as being pink or red, with others having been bred for colour rather than scent, but I was obviously wrong.

And the yellow roses brought to mind this set of papers and die cut decoupage that came as the cover mounted gift with an issue of docrafts magazine last summer. The lace was part of a RAK and the ribbon was salvaged from a bunch of flowers (well, today IS National Upcycling Day!) and as for the paper doiley - it came from a bulk pack I bought in the Chinese cash and carry!!! The butterfly is cut with a Spellbinders die - if you squint really hard you will see there is a second one underneath to give just a glimpse of yellow under the cream wings.


I'm sharing this card with

Butterfly Challenge #33 - F is for Flowers
Fan-tastic Tuesday - a Touch of Summer  
Sparkles Monthly Challenge - Vintage/Shabby Chic

Simply Happy Birthday

I've been playing around with a set of docrafts border stamps I bought at the weekend, and I thought this pretty heart border was ideal for a very CAS card.

I masked off all but a strip of the front of a card and used Cut'n'Dry foam to sponge in the separate colours from a Kaleidacolor pad in "Birthstone". Then I used a fine liner pen to add definition to the edges of the strip and stamped the border down the centre using Versafine ink.

The pennants are from a stamp set I won in a recent challenge but I didn't keep the wrapper so I can't remember who they are made by. I stamped them with the first, third and fifth inks from the Birthstone pad, this time using the colours in reverse order from those in the main strip. The "Happy Birthday" greeting is an old stamp I bought at a show - in fact it's so old, that font was fashionable when I bought it! And I think the font, whatever it is called, is long overdue for a revival.

As a finishing touch I added a touch of holographic glitter glue to the open heats at the top and bottom of the border, although I don't know whether that will show up on the photos.


I'm playing along with

CAS on Sunday #61 - One Layer
Allsorts Challenge week 316 - Use a Stamp
Creative Card Crew #90 - CAS  

Cherry tomato and chive quiche

Is it a quiche? Is it a tart? Is it a flan? I really don't know - for many years, I thought the only true quiche was Quiche Lorraine, complete with bacon and cream, but nowadays just about anything in an open pastry case gets labelled as one, so I'll go with the flow....... Call it what you will, it's the taste that counts!


This is another post for the Farmer's Choice blogging team  and this time I have used eggs, milk, butter and some gorgeous tomatoes that they sent me.


This summery dish would be ideal for a picnic or a party in the garden.
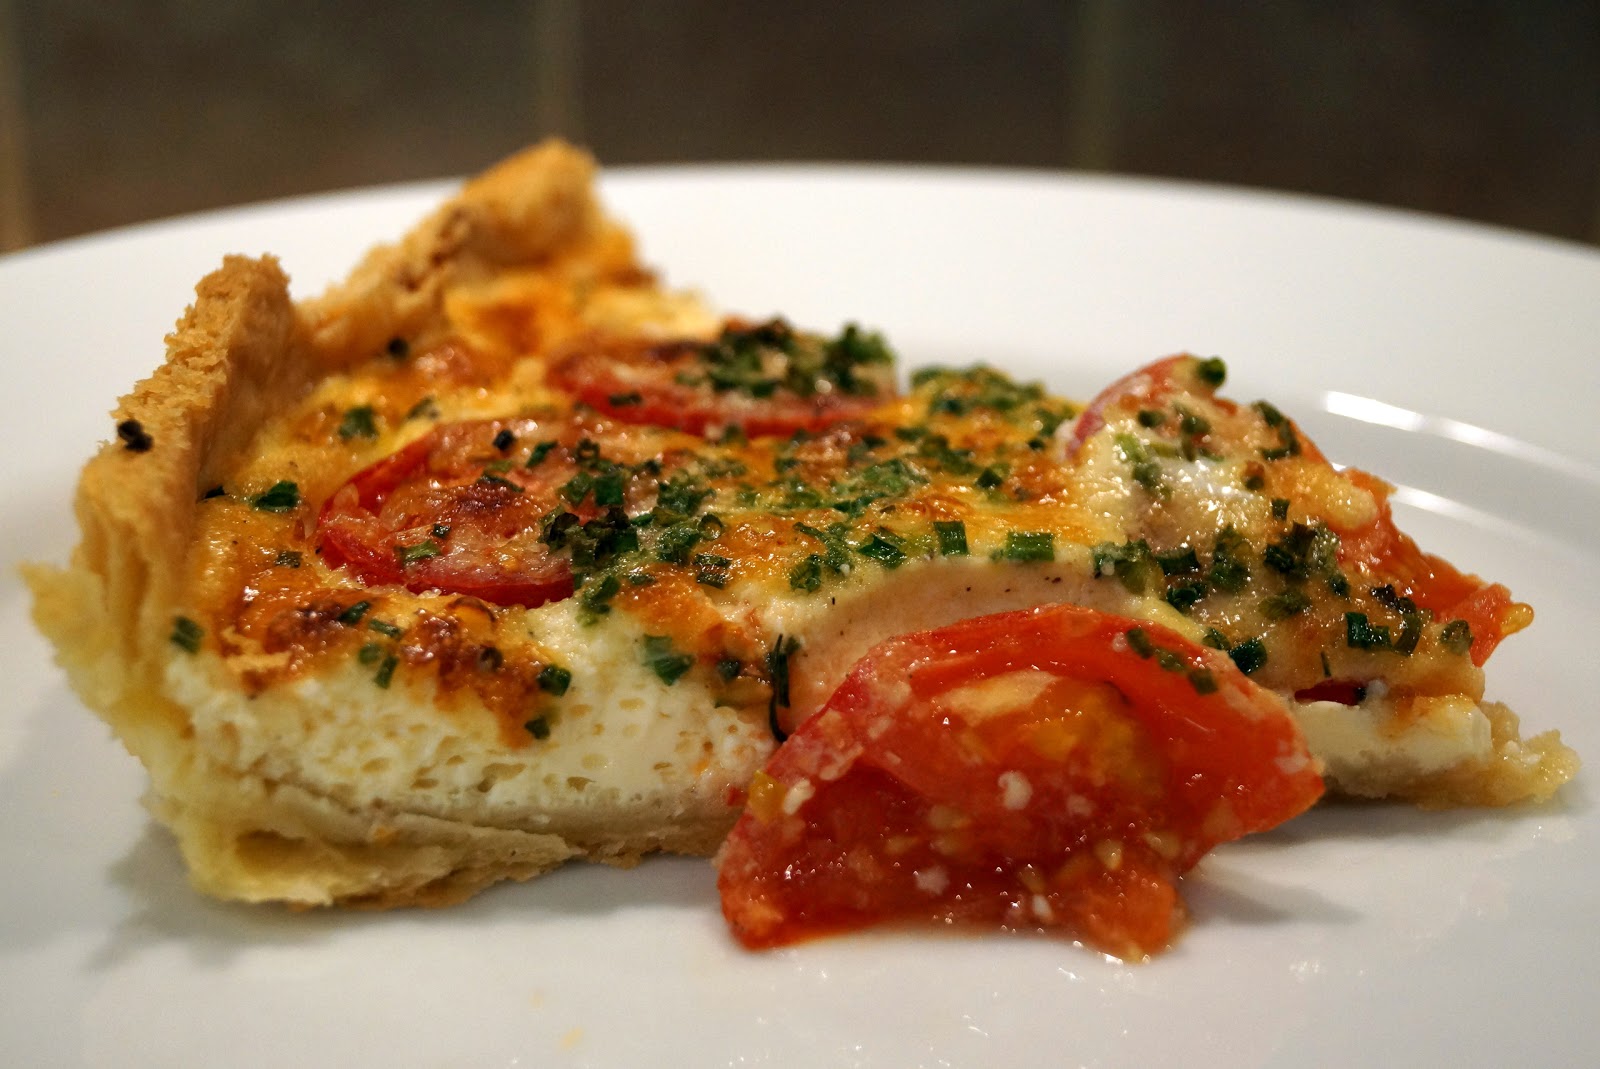
 

Cherry tomato and chive quiche

This needs a 28 cm flan tin. It will make 6-8 main meal servings, or on a picnic or buffet spread can be cut into 12-16 slices.

for the pastry

250g plain flour
125g cold butter, diced
pinch of salt
water to mix

for the filling

1 punnet (350g) large cherry tomatoes
3 large eggs
250ml semi skimmed milk
130g Cheddar cheese
small bunch of chives
seasoning

Sift the flour and salt into a large bowl and cut the butter into it with a knife until all the pieces are covered in flour. Then rub the butter into the flour with your fingertips until it is all blended in (TIP: shake the bowl from time to time – and unmixed lumps will rise to the top.) Use the knife again to stir in cold water a little at a time until the dough comes together and is soft and manageable.

Wrap  the dough in clingfilm and refrigerate for 30 minutes to 1 hour.

Meanwhile,  grease your tin and line the base with non-stick paper.

Prepare your filling ingredients – beat the eggs and milk together with salt and black pepper. Adding the salt before you start to beat will help the eggs to break down into the milk. Finely grate the cheese, chop the chives and halve the tomatoes.

Remove pastry dough from fridge and roll out to fit your flan tin. Carefully place it in the tin but don’t trim the edges, prick the bottom a few times then line with a piece of scrunched up greaseproof paper. Fill the paper with  a single layer of baking beans, spreading them evenly to help keep the base flat and the sides upright. (You can buy ceramic beans intended for this, but I use a packet of dried chickpeas which are much cheaper. They can be saved in a jar and reused for many years, but remember to label the jar “Do not eat”!) Place the pastry shell back in the fridge to chill while the oven heats up.

Heat the oven to 220C (200 fan),  425F gas mark 7. Place the pastry in the oven and cook for 15 minutes, then lift out the paper and beans and cook for a further 5-10 minutes until golden.

Remove from the oven and reduce the temperature to 190C (170 fan), 375F, gas mark 5. Trim excess pastry from around the top of the flan case to leave the top edge flush with the rim of the tin.

Spread about two thirds of the grated cheese over the base of the case and then arrange the tomato halves, cut face upwards, over it. Pour in the egg and milk mixture around the tomatoes. Sprinkle the remaining cheese over the top, followed by the chives.


Bake for 30-35 minutes until the filling is set and the cheese is golden.


Serve hot, cold or – my favourite way – lukewarm.


Print Friendly and PDF

Tuesday 23 June 2015

Use a die or a punch at Cardz 4 Guyz

This week at Cardz 4 Guyz we'd like to see your creation featuring a die cut or punched shape. And don't forget to keep it masculine!

For my card, I've used dies from the Docrafts Build a Scene Nautical set, cut with my Grand Calibur.

First of all, I sponged light blue ink all over a white card for the background. Then I cut the waves from blue card, the whale from grey and the spout from white, all from my snippets box. I sponged white ink around the edges of the waves to look as if they were breaking into foam at their tops.

To make the whale look a bit more "Whaley" I sponged a little darker grey ink over his back and tail and a touch of white on his belly.

To make the cloud, I computer generated the sentiment and then hand cut it as I didn't have a suitable die.

When it was all assembled, I added clear Wink of Stella to the spout and a tiny but to the waves, although this doesn't really show in the photo. Finally, as the blue sea showed through the whale's eye, I coloured it in with a black gel pen to make it stand out more - I think it gives him a cheeky expression - and sketched in a few gulls with an ultra fine black pen.


I'm playing along with
 
Addicted to Stamps and More - CAS  
Oooh La La Creations - Happy Birthday 
Addicted to CAS - Splash!
Pixie's Snippets Playground - weeks 181/182   
Suzy Bee's Blooming Challenge - Something blue 
Cuttlebug Mania - Sentimental Journey 
Creative Card Crew - CAS
Inkspirational - Word Prompt Wild


Monday 22 June 2015

A Seraphina Shutter card

Recently a very good friend went to a crafty blogging day (I wish there was one of those near to me!) and was given a spare set of the gorgeous Readicut goodie box to send to me. It included lots of die cut sheets and papers from the Seraphina range, as well as a CD of the range and much more. Today I've been playing with some of the die cuts and papers.

I decided to make a tri-fold shutter card, so used my Hougie board to score and cut the basic card, then covered each panel with papers matted onto contrasting card. Then I die cut mats for two of the toppers and added them to the front and back of the card, with sentiments added to the central panels. A bow and flower from another of the die cut sheets added a finishing touch.


I am sharing this with

Ooh La La Creations - Happy Birthday
Make My Monday - The Beach

Friday 19 June 2015

The Naschmarkt in Vienna

This weekend it's the Austrian Grand Prix - which means that the F1 Foods challenge at Caroline Makes is all about Austrian recipes.  However it's beginning to look a lot as if I'm not going to get time to cook and blog a recipe before the challenge closes, so I thought I'd talk a little about one of out favourite foodie spots in Austria instead.


Now Mark and I love Austria, and we love Austrian food, and most of all we love Vienna. And one of our favourite spots in Vienna is the Naschmarkt. It's a long, semi-covered area of a mixture of market-style stalls, shops, restaurants and cafés, all of which sell food, drink or tableware. Most of it is aimed at local people rather than tourists, so there are fruit and veg stalls, spice stalls, meat, cheese and charcuterie stalls, oil and vinegar shops and stalls selling ready prepared delicacies such as beautifully arranged stuffed vegetables and salads. It would be easy to pop in on the way home from work and grab the ingredients for a stunning dinner party!

I'm just going to leave you to drool over some of the stalls we've enjoyed visiting.....